Before beginning, If you decide to Root your Samsung Galaxy M20 4GB RAM variant, think twice. You already have enough RAM, say 2-2.5 GB RAM Always free, if you didn’t use heavy applications in the background. But if you have 2GB RAM, and have issues with Unnecessary bloatware running environment, proceed this process. Here, we are providing the steps to do that. Just mind, you can’t root this device without using pc, It starts with Oreo version. After the marshmallow version, Most of the devices can’t root without using PC.

In case you have already rooted your Samsung Galaxy M20, before but somehow you have lost the root access; also, in this article, we will show you how to install the TWRP recovery on a previously rooted Samsung Galaxy smartphone using the Flashify app. In general, you’ll learn quite a lot of tips from this tutorial article. We have made the various steps for rooting a smartphone appear very simple, so, you can act by yourself even.
Benefits
Like you may know, rooting a device makes you the full administrator of that device and the warranty coverage from the OEM is voided. Also, rooting grants you access to customize a mobile device to look or function as you want. For example, you can’t possibly uninstall a specific pre-installed app on a device until you root that device. I Installed Ported Lightweight ROM. UI in Samsung M20 is good compared with other Mid-range phones, But if you annoyed by the UI, you can use some lightweight ROMs.
You will Lose the following
Yep first of all Warranty. But additional to this. M20 supports Netflix and Amazon HD contents. You will lose Netflix HD Content support. Because rooting will trigger copyright protection. So after rooting your Samsung M20, you will not be able to view HD contents in Netflix. I Used some apps to hide the OEM unlock, but most of the times it fails.
Samsung Galaxy M20 Rooting Tutorial
This method will support SM-M205M, SM-M205F, SM-M205G, SM-M205FN Model numbers. Beyond this series, if you have unlocked bootloader or International devices. You can try at your own risk. There are two steps, in this method.
- PC Side work
- Mobile side work.
Somebody is saying you can install magisk; it is systemless. Where will you install? Samsung devices don’t come with custom recovery; install using Stock recovery will brick your device.
Note
-
Make sure your device battery is charged above 50%
-
Backup your current files and data, just in case (save them on external storage).
- Follow steps very carefully. Skipping a single action can brick your device. Try it at your own risk.
Pre-Ready for the Process

-
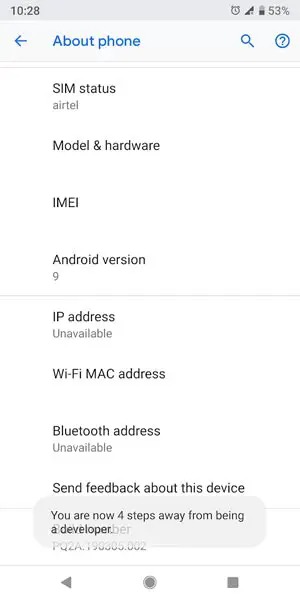
Enable USB Debugging Mode in your mobile. To do this; go to settings >>> about >>> Tap on the “Build Number” 7-10 times consistently to enable “Developer Options,” then go to the “Developer Options” and enable USB Debugging Mode. If you use other than M205F version, you may have OEM unlock option. Enable this also. If you didn’t have any, no problem. The choice is region dependent.
-
Download and install the Samsung USB driver to your computer system.
-
Also, download the ODIN software. Select above Oreo version in the ODIN list. Install ODIN in your PC.
-
Download and save the TWRP Recovery file (Mirror 2- AFH Mirror) for Samsung Galaxy M20 on PC. Thanks to XDA Developer DarkLord1731, Without him this TWRP file is not possible.
- Download and save the Magisk.zip file for on Samsung Galaxy M20 Internal storage (Download the latest one).
PC side work
Flash TWRP using ODIN

-
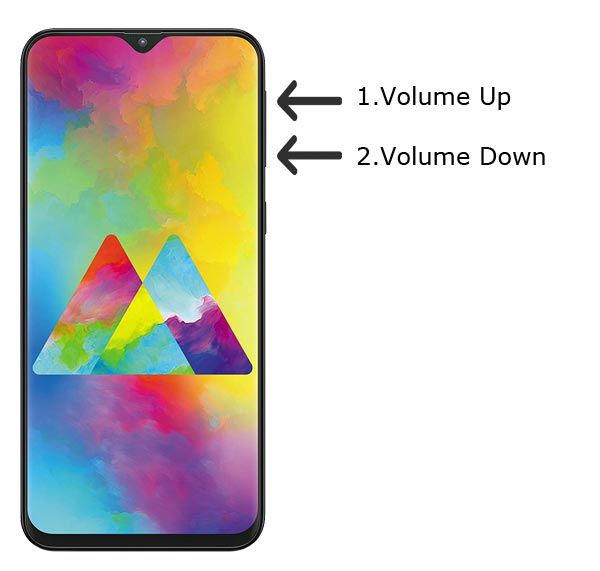
Restart the device. Then, enter into Download mode. To do this; press and hold down the Volume Down + Volume Up buttons at the same time.

-
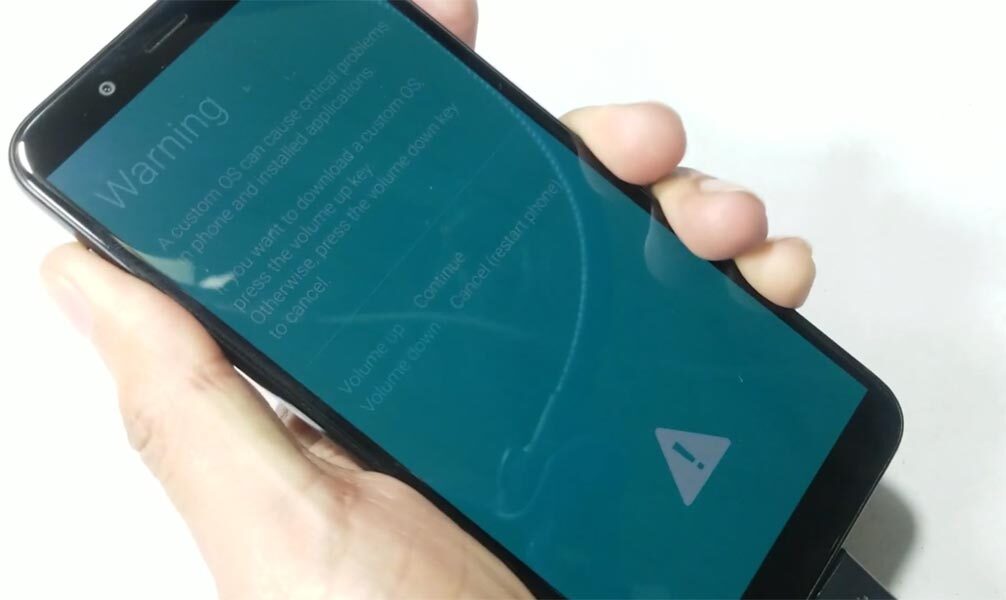
Press the Volume Up button to continue when you see the warning message.
-
Now, connect the Samsung M20 mobile to the computer via USB cable
-
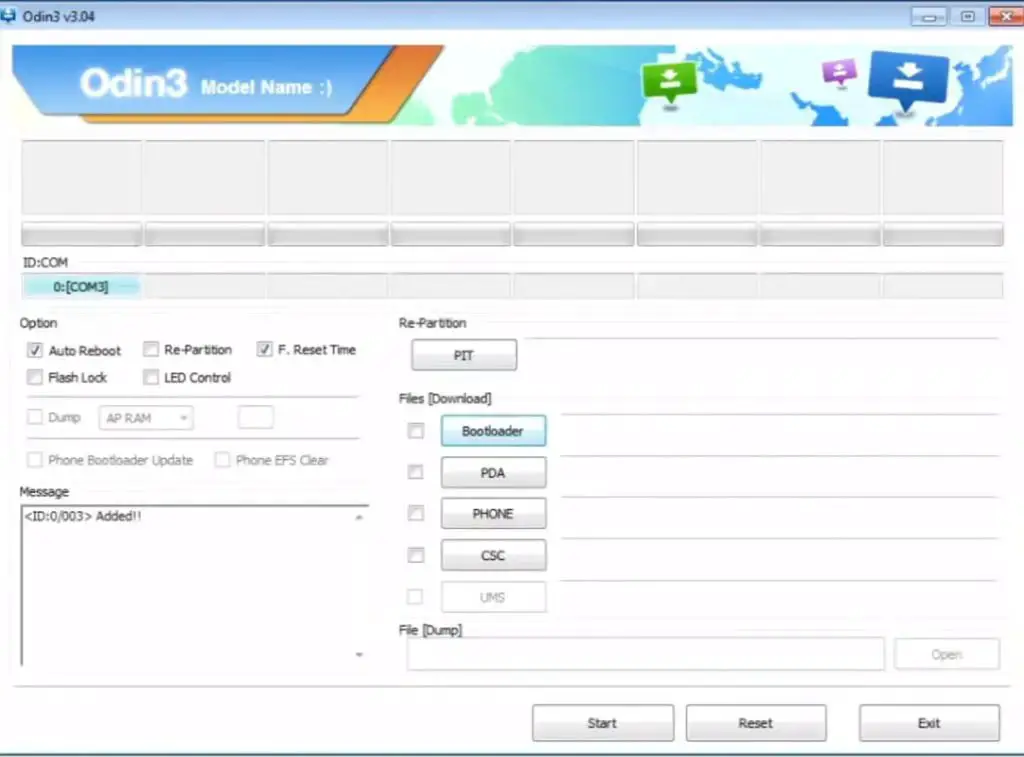
Launch the Odin app on your computer. If the device is detected by this app (Odin), it will show you a message that reads – added!!!

However, if the device is not correctly connected to the PC, you won’t see this message. So, you have to check the USB cable if it is good and reconnect the device.
-
After connecting the Samsung device, click on the PDA/PA button to browse/search and get the TWRP Recovery file from where you saved it on your PC. Also, navigate to “options” and tick the Auto-Reboot.
-
Click on “Start”
-
Once the TWRP is loaded into the device, reboot your device in TWRP mode. To do this; Switch off your phone, press and hold the Volume up + power buttons and the device will go into TWRP recovery mode.
-
Kudos, you have just Installed the TWRP Recovery on your Samsung Galaxy M20.
Now that you have installed TWRP Recovery, it’s time to root the device with the Magisk app.
Mobile Side Work
Install Magisk
-
Still, in the TWRP recovery mode, select wipe >>> advance wipe >>> cache data (Remember to make a backup first)
-
Return to Home in the TWRP Mode, tap “Install” and select Magisk.Zip
-
Swipe to install the App.
Nothing more, reboot the device regularly, you have rooted your Samsung Galaxy M20. However, you should install Magisk Manager APK to manage Superuser Permissions. Just download and install Magisk manager app as you do for Normal APK files.
Install TWRP in a rooted device
To install the TWRP file on a rooted Samsung device follow the steps below
- Download Flashify App.
-
Download TWRP Recovery file (Mirror 2- AFH Mirror) For Samsung Galaxy M20.
-
Launch the Flashify app, grant SuperUser permission and search for the downloaded TWRP recovery image to install it.
-
To check if the TWRP Recovery is rightly installed, enter into recovery mode by holding down the respective buttons.
What more?
There is no more action to do; you now have unlimited access to your device. You can install Custom ROM if you wish, there are plenty of Custom ROMs available for Samsung Galaxy M20. When installing Custom ROMs, Always backup first. You can easily install them using either Flashify or TWRP. If you bricked your mobile- Flash firmware manually in Samsung Galaxy M20.

Selva Ganesh is the Chief Editor of this Blog. He is a Computer Science Engineer, An experienced Android Developer, Professional Blogger with 8+ years in the field. He completed courses about Google News Initiative. He runs Android Infotech which offers Problem Solving Articles around the globe.


Leave a Reply