It is a Pain when using this Samsung Galaxy J2 model in 2019. Just 1 GB RAM what? Gosh! These bloatware apps are so annoying, can’t we get a smartphone and choose our apps? Why are these manufacturers zapping our little, managing storage with unuseful pre-installed apps? Well, do not bother any more, here is a solution to get rid of all things you do not wish to have/see on your Samsung Galaxy J2 – ROOT THE PHONE! There are many models of the Samsung Galaxy J2. Today, we will be sharing how you can effectively root the SM-J200 model running on Android version 5.1.1 (Lollipop).
Different models of this smartphone were launched in 2015 as one of the mid-Level smartphones for Samsung users. The default operating system available is Android, version 5.1.1 (Lollipop).
Supporting Versions: Here, I Include the CF-Auto-Root For SM-J200F, SM-J200G, SM-J200H, SM-J200M. So other than these models. Don’t try it.
Terminating the bloatware apps
You cannot delete or uninstall most of the first apps you see on this smartphone. Albeit, when you root your J2 device, you will be able to manage all its apps and settings limitlessly. Yeah, pre-installed apps (bloatware app) can only be disabled if you do not root your device, and when they are just disabled, they still rob you of some useful storage spaces. So, quite a lot of people, especially advanced smartphone users tend to root their device to get rid of these apps. So after rooting your mobile, you can uninstall them using System App Remover.
Must I root my Samsung Galaxy J2?
Yes. Can you live with it 1 GB RAM? Really? You can’t. Asides from removing the bloatware apps that occupy a chunk of reasonable space on your device, there are other things you’ll gain as a result of rooting your smartphone. If you wish to install a custom firmware/ROM root access is needed. Also, for some specific applications to run on your Galaxy device, root access is required equally.
Rooting your Device
There is only one step- Flashing CF-Auto-Root. If we use the TWRP method, we need an additional level. This method directly installs SuperSu. So it can efficiently Manage Superuser Permissions. But if you want Magisk Manager, you can install using APK File; I will include this also at the end.
Pre-Ready For Rooting
-
Make sure your device battery is charged above 50%.
-
Backup your current files and data, just in case (save them on external storage).
-
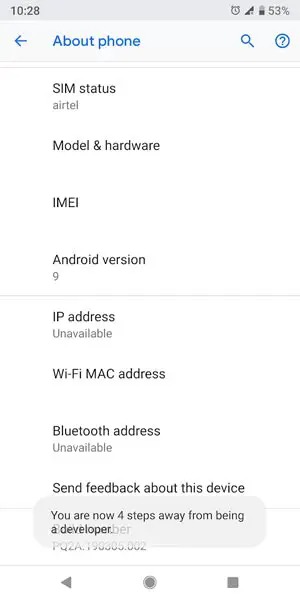
Enable USB Debugging Mode in your mobile. To do this; go to settings >>> about >>> Tap on the “Build Number” 7-10 times consistently to enable “Developer Options,” then go to the “Developer Options” and enable USB Debugging Mode. There is no complicated process in the J2 since it is an older device.
-
Download and install the Samsung USB driver to your computer system.
-
Also, download the ODIN software. Select above Lollipop version in the ODIN list. Install ODIN in your PC.
-
Download and save the CF-Auto-Root File. Select the correct model or Else; It won’t work.
- CF-Root file ( SM-200F / SM-J200G / SM-J200H / SM-J200M ). The download links always work 100%. If you face any problem, you can check our secondary AFH Mirror ( SM-200F / SM-J200G / SM-J200H / SM-J200M ).
Flash CF-Auto-Root using ODIN
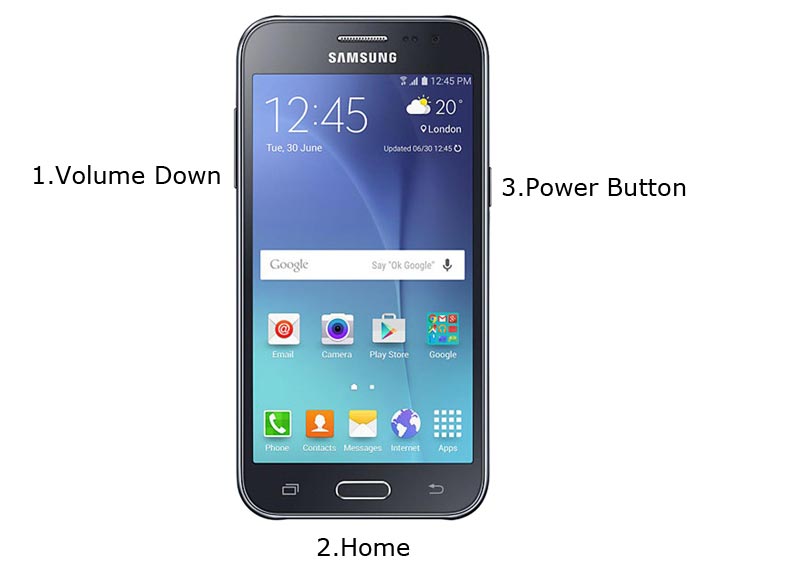
- Restart the device. Then, enter into Download mode. To do this; press and hold down the Volume Down + Home+ Volume Up buttons at the same time for some time.
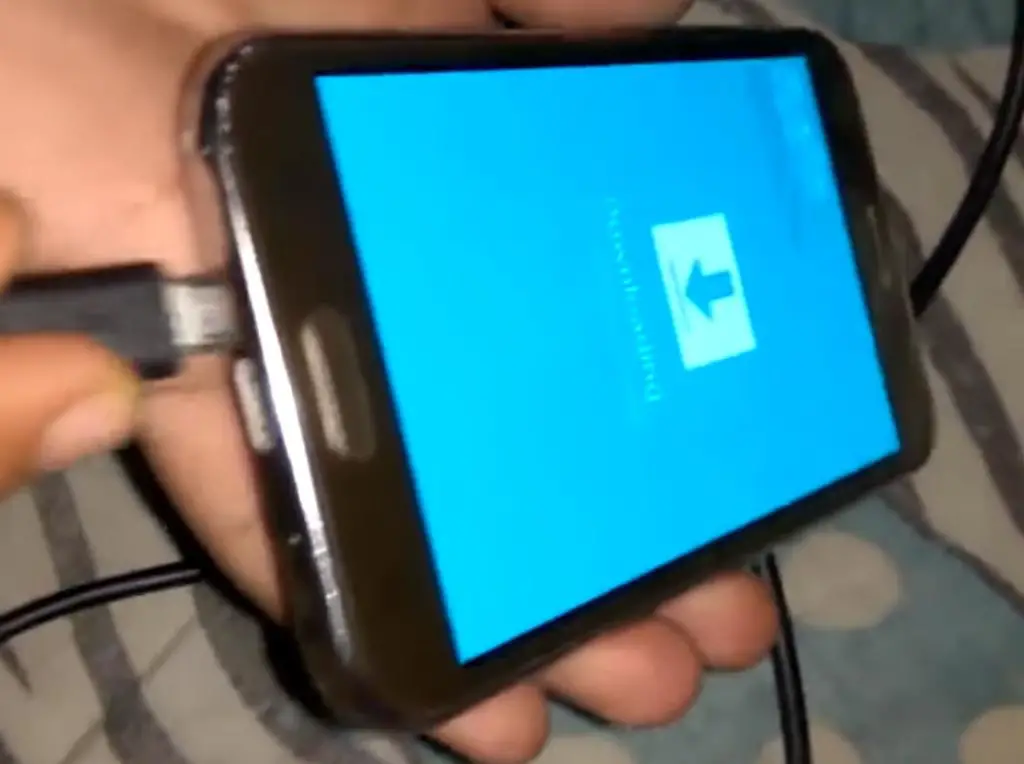
-
Press the Volume Up button to continue when you see the warning message.
-
Now, connect the J2 mobile to the computer via USB cable.
-
Launch the Odin app on your computer. If the device is detected by this app (Odin), it will show you a message that reads – added!!!
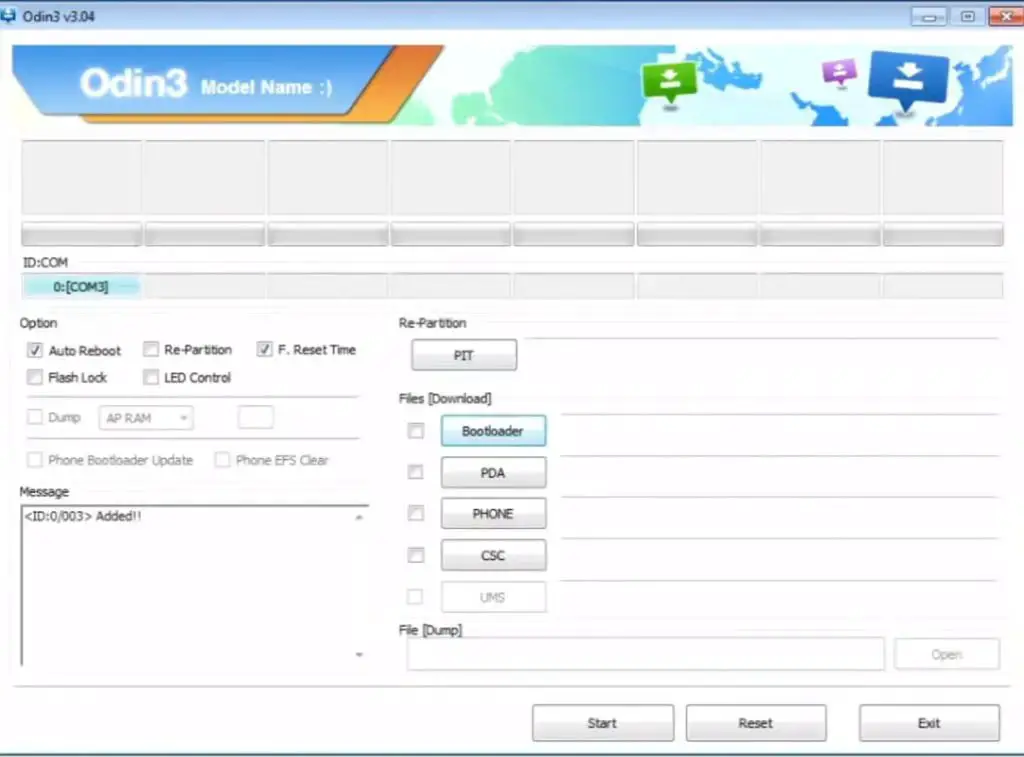
However, if the device is not correctly connected to the PC, you won’t see this message. So, you have to check the USB cable if it is good and reconnect the device.
-
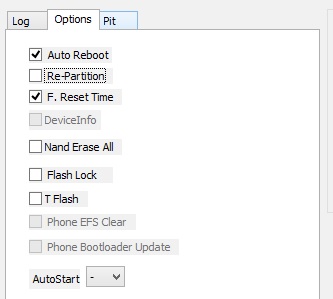
After connecting the Samsung device, click on the PDA/PA button to browse/search and get the CF-Auto-Root file from where you saved it on your PC. Also, navigate to “options” and tick the Auto Reboot.
-
Click on “Start”
-
Once the file is loaded into the device, reboot your device.
-
Kudos, you have just Installed the SuperSu App on your Samsung Galaxy J2.
However, the SuperSU app will appear among your installed app so you can manage Root permissions. If you wish, you can install Magisk Manager APK to manage Superuser Permissions. Just download and install Magisk manager app as you do for Normal APK files.
Troubleshoot- SEANDROID ENFORCING FRP Lock
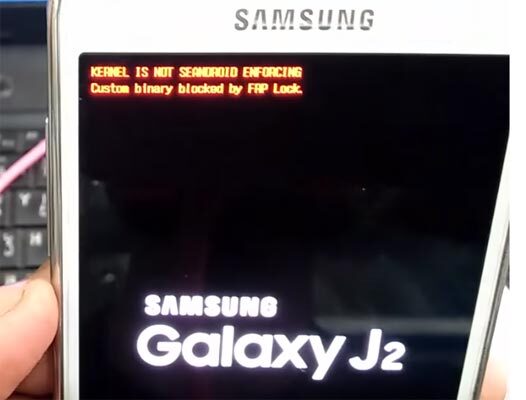
Hmm… It can happen, Out of 7 Devices I rooted, only one device got this Problem. You can easily remove it by Flashing firmware. You can check own firmware here. Flashing firmware is the same as the above steps. Instead of CF-Root file flash downloaded firmware file.
What More?
If you ask me, Should I root in other devices ?, I Will suggest both sides. But For J2, I suggest you go for root and free Bloatware apps. If you wish to use custom ROM, there are plenty of custom lightweight ROMs available in XDA-Developers. Because you already rooted, you can easily install them using Flashify app or TWRP recovery.

Selva Ganesh is the Chief Editor of this Blog. He is a Computer Science Engineer, An experienced Android Developer, Professional Blogger with 8+ years in the field. He completed courses about Google News Initiative. He runs Android Infotech which offers Problem Solving Articles around the globe.


Leave a Reply