LG G3 comes with a KitKat version. It received Two Major upgrades from LG. After Marshmallow 6.0 version, LG stopped major upgrades and security patch updates. Most of the people who bought this mobile use this as either a primary or secondary device. If you root your mobile, you can flash Custom ROMs. There are some official Custom ROMs that are also available. In Specific Lineage OS 16.0 based on Pie 9.0 version available for this device. Official release means you will receive regular patch updates and Major upgrades. There are two methods available in this process. You can use the LG One Click Tool or TWRP method. If you use the TWRP method, after the first boot, you should Install Magisk. When you use the LG One Click Tool method, you can use the default SuperSU, or you can replace Magisk.
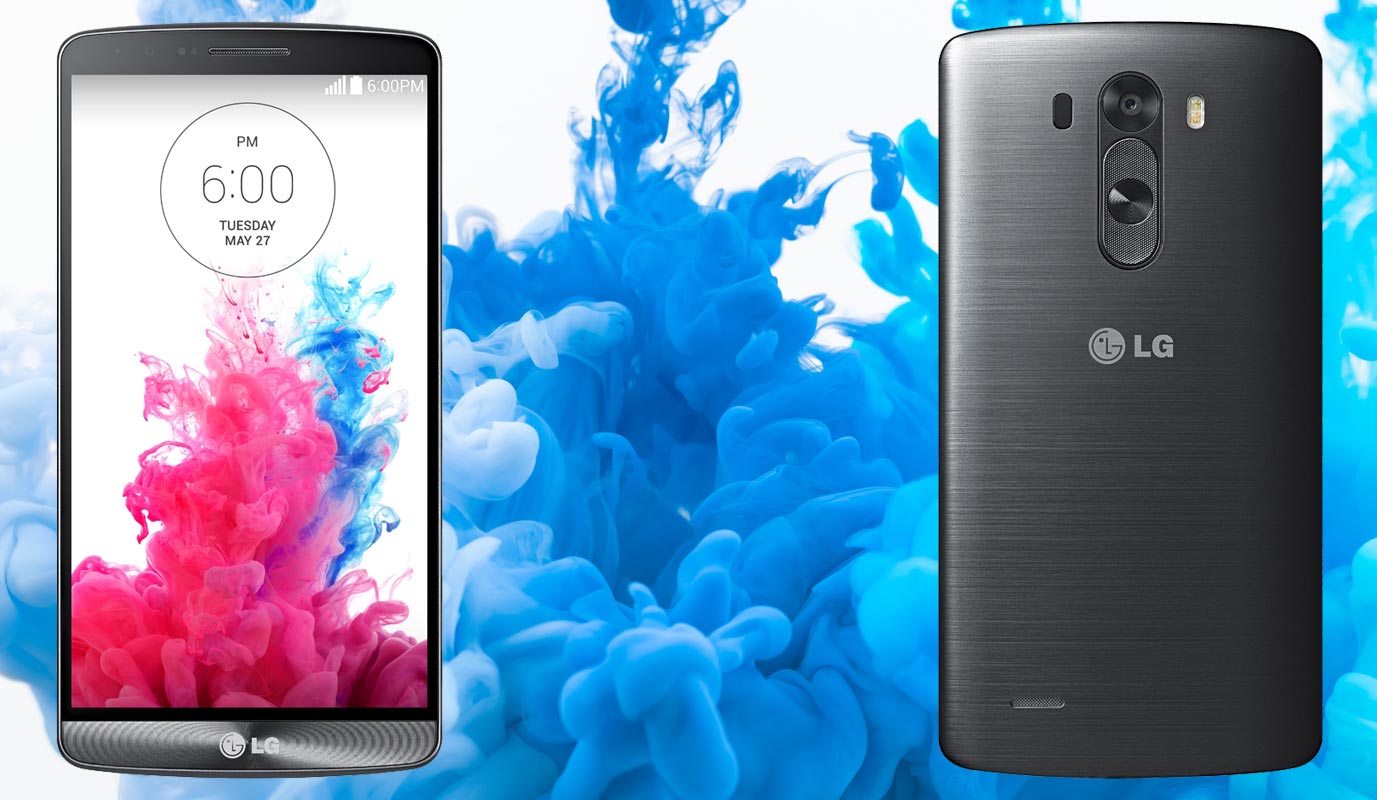
Why should you Root LG G3?
We appreciate the hard work of the TWRP team and XDA Developer- avicohh. Without them, this Root method is not possible. Your mobile has a minimum of 2 GB of RAM. It is enough for normal usage. But, LG stopped Security patch updates. Also, It is based on Old OS, So we can’t expect Many optimizations. It has a Qualcomm MSM8974AC Snapdragon 801 processor. So, If we Install Custom ROM, We can expect some Improvements.
Due to Poor RAM Management in Old device, you will feel laggy. If we optimize correctly with correct Custom OS after rooting, we can see some Improvements. So, after root, I can expect a Lag-free experience? Probably. Also, if we hibernate and eliminate a lot of unwanted apps and optimize some apps, your device is hardware limited. But, within these limits, we can enhance the performance by 20-30% compared with your old usage. If you use Lite weight Custom ROMs, you can expect a 40-80% improvement in performance based on what custom OS you are choosing.
How to Root LG G3 Marshmallow 6.0 (D855 (Europe), D850 (AT&T), D851 (T-Mobile), D852 (Canada), LS990 (Sprint), US990 (US-Cellular), VS985 (Verizon Wireless), Unlocked)
LG G3 International Variants comes with a flexible bootloader other than some locked devices. Example- In Samsung, Verizon mobiles come with locked Bootloader. We can Unlock your Bootloader using the script. This means that different smartphone variants can be easily rooted. Also, the device can accept to install TWRP recovery or any other custom recovery file/app alike.
TWRP recovery is a custom recovery file that must be installed on your devices because you can root them successfully. In this article, we explained the easiest method to follow and install TWRP recovery on LG G3. However, the tool required for rooting this device is the Magisk App.
With the help of TWRP Recovery, you can quickly flash the latest version of Magisk into your LG G3 to gain root access. Before sharing the tutorial, you may want to know that, with the TWRP recovery present on your device, you can easily install any custom ROM or firmware. Does it seem complicated? Relax, everything will be explained succinctly in bullets.
Things to check out for;
-
Make sure your device battery percentage above 50%
-
Backup your current files and data, full data loss process (save them on external storage).
- This method will Unlock your Bootloader.
- You should not disconnect your mobile during the whole process.
- Don’t close the LG One Click Tool, If you select Method 1. It should run until the process done.
- You should use a Laptop or Power Backup PC. The process should not be interrupted in the middle.
Pre-Requirement Steps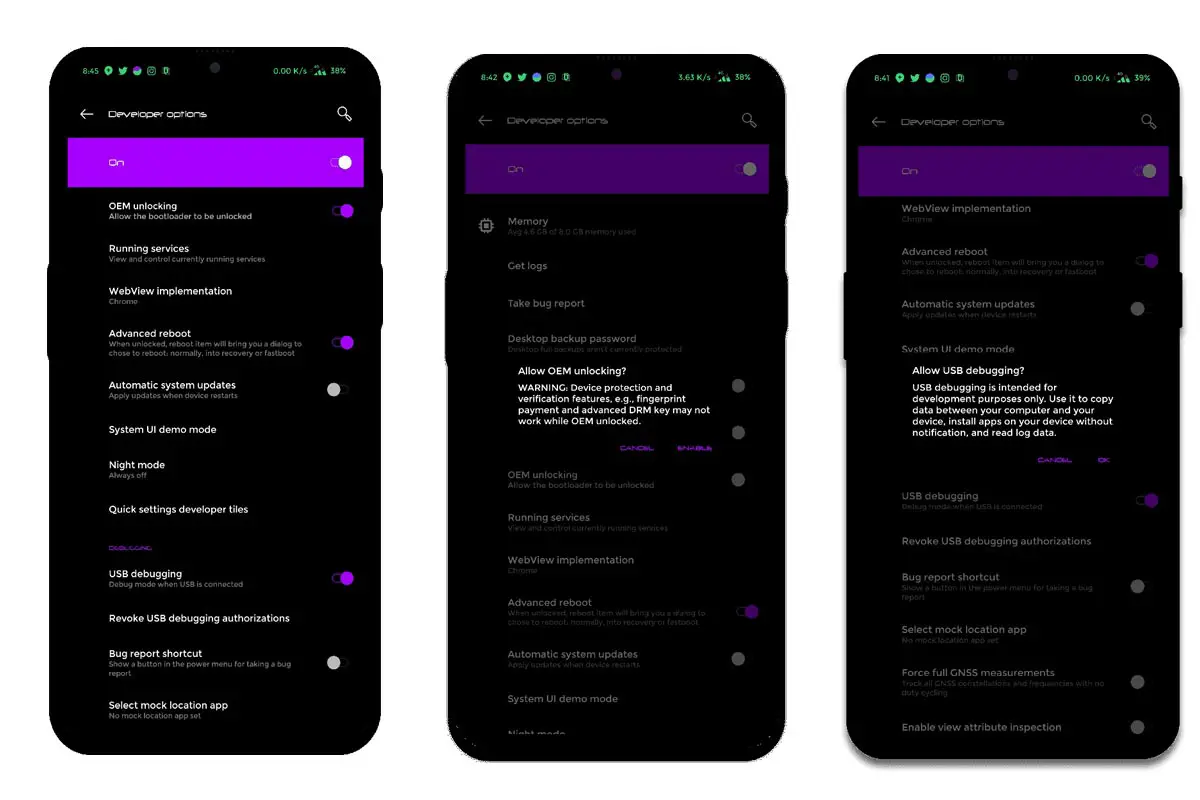
-
Enable USB Debugging Mode and OEM Unlock on your mobile. To do this; go to settings >>> about >>> Tap on the “Build Number” 7-10 times consistently to enable “Developer Options,” then go to the “Developer Options” and enable USB Debugging Mode, OEM Unlock. There is no complicated process in the LG G3.
-
Download the ADB drivers and LG USB Driver. Install both files on your PC.
Method 1: Flash TWRP and SuperSu using LG One Click Tool
- Download LG One Click Root v1.2 / Mirror and save it on your PC. Extract the file. Install the data on your PC.
-
Open One-Click Tool. Connect your mobile to PC using USB Cable.
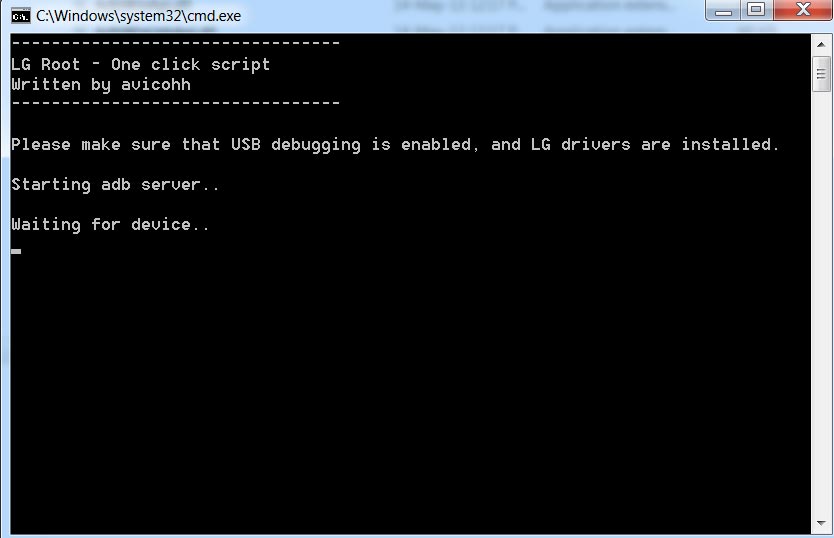
- After you get the “Device detected” message, the SuperSu Script should run within a few minutes. If the script didn’t run, Unplug your mobile and restart the whole process.
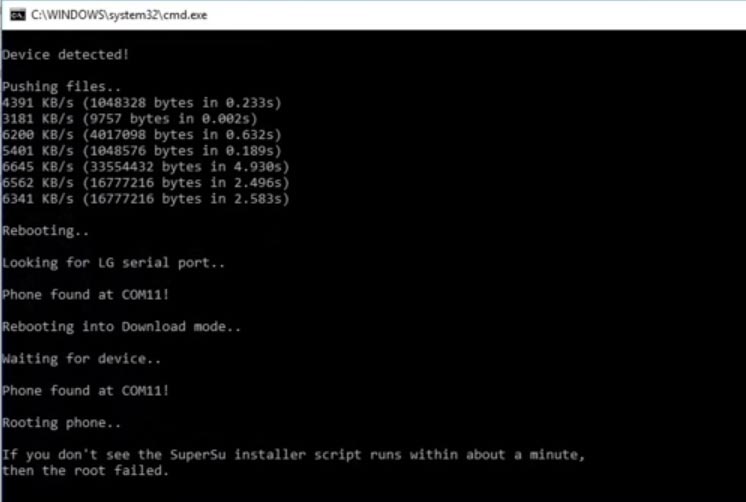
-
The script will install SuperSu on your mobile successfully after the flash follows on-screen Instructions.
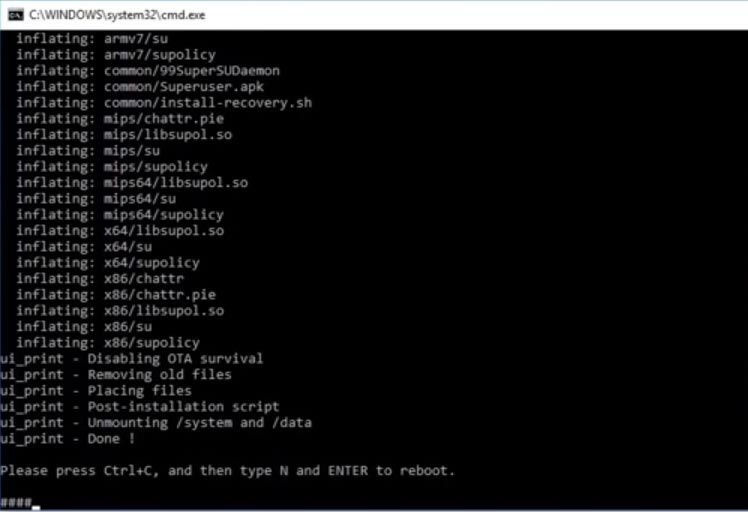
- Press ctrl+c and Type “N” and press enter to Reboot your mobile.
- You will be booted into Recovery mode. The app already pushed the SuperSu file. So, there is no need to transfer the data on your own.
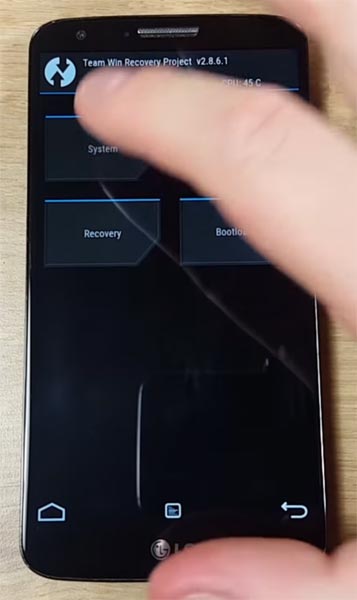
- After booting into TWRP, Select Wipe->Advance Wipe->Select Cache Data.
- Select-> Backup ->Take complete Backup.
- After the Successful Backup, return to the home of TWRP and Select “Reboot System.” Now you have rooted mobile with the SuperSu app. If you want to install Magisk, move to the below steps. If you are satisfied with the SuperSu app, you can ignore the below step.
Method 2: Flash TWRP using ADB and Fastboot
- Download TWRP Official File (AT&T, Canada, Korea F400, Sprint, T-Mobile, Verizon). You should select the latest TWRP file as per your carrier. Copy this file to ADB and fastboot folder.
- Switch off your mobile. Connect mobile with PC using USB Cable.
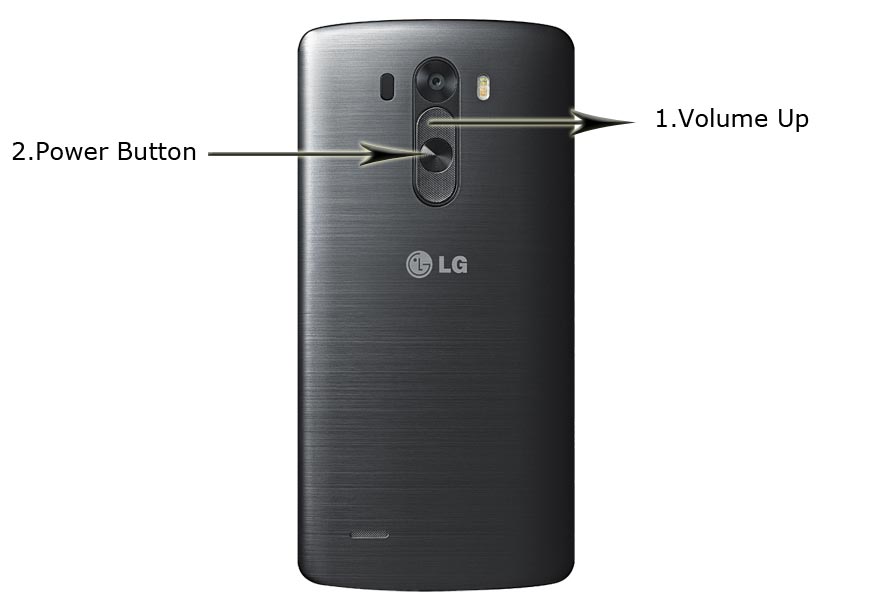
- Press Volume Up+ Power Button to enter into Download Mode.
- Launch a command prompt and enter the following commands one by one.
- adb shell
su
dd if=/dev/zero of=/dev/block/platform/msm_sdcc.1/by-name/recovery
dd if=/sdcard/recovery.img of=/dev/block/platform/msm_sdcc.1/by-name/recovery
exit
exit
adb reboot recovery
- Don’t boot into the standard OS. Move to Magisk Installation steps.
Install Latest TWRP Using the Flashify app (Optional)
- If you need the latest version of TWRP, you can Install the file using the below method. If you feel you are ok with the Old version, you can ignore this step.
- Download Flashify Apk.
- Download TWRP Official File.
- Open the Flashify app and Install the TWRP. Don’t Boot into recovery using Flashify app. Switch off your mobile and boot using Volume Down+ Power Button keys. You should not boot into your mobile until Magisk installation using TWRP.
Install Magisk on your LG G3 using TWRP
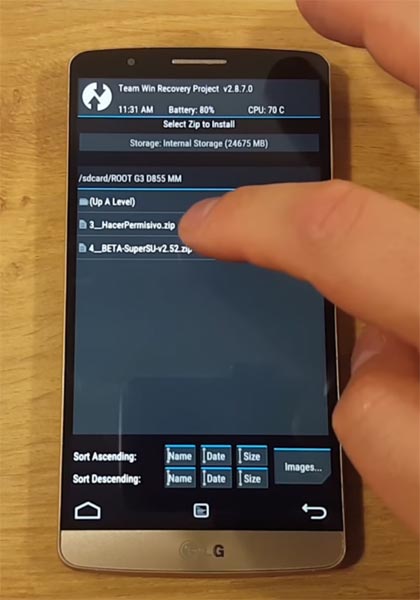
- Download Magisk.Zip (Latest Version) and Copy it to Your External SD card storage.
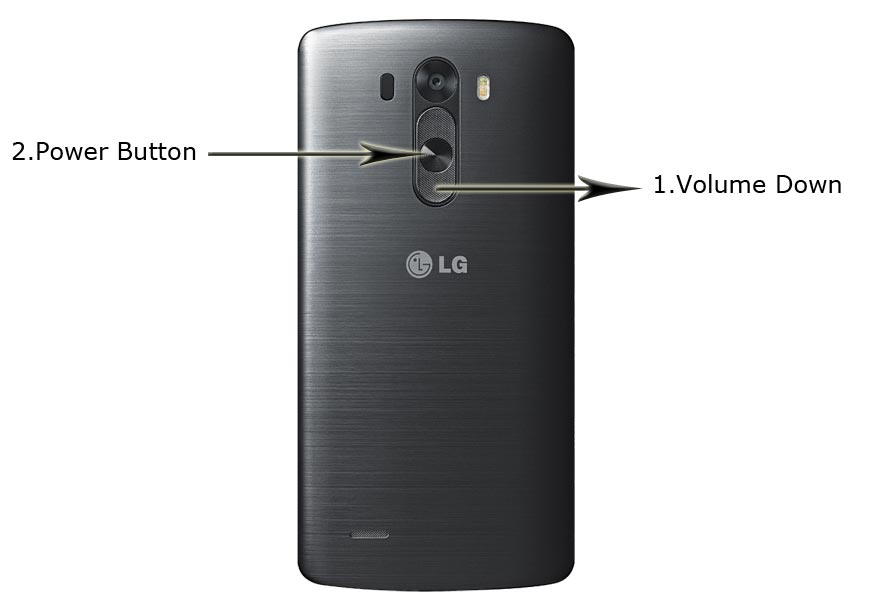
- Switch off your mobile. Boot into recovery mode-> Volume Down + Power Button.
- Select Wipe->Advance Wipe->Select Cache Data.
- Return to Home of TWRP select Install.
- Select Magisk.Zip.
- After the Successful Installation, Reboot your mobile.
- You can also install Magisk Manager in your Mobile Applications If you can’t find the Magisk app in the App Drawer. Install a Root checker to verify your Root Status.
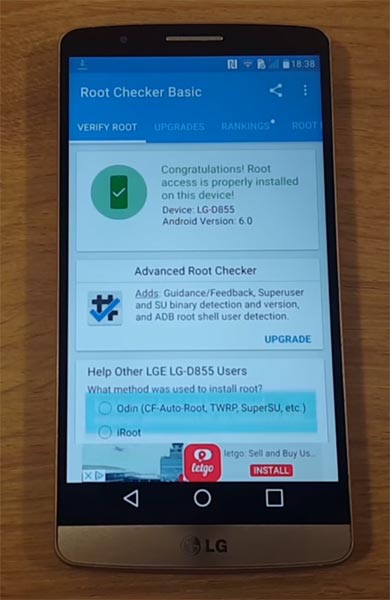
- Uninstall SuperSu app If you root with Method 1. If you use Both the Magisk and SuperSu, It can cause some trouble.
What More?
LG G3 has a minimum of 2 GB RAM, and it is a Flagship phone when it is released. Now it can be a Good Mid-Range phone in this latest Android World; The RAM is more than enough. If you don’t know How much RAM you need, Nowadays, 3 GB RAM is enough for regular usage. There will be no Regular Major updates and monthly updates from LG for a long time. Compare it with Old devices. Some models are still receiving updates. So, you know what you are doing and the real purpose, you can root your device. By rooting and flashing custom ROM, you can use New Android versions without any lag issues.

Selva Ganesh is the Chief Editor of this Blog. He is a Computer Science Engineer, An experienced Android Developer, Professional Blogger with 8+ years in the field. He completed courses about Google News Initiative. He runs Android Infotech which offers Problem Solving Articles around the globe.


Leave a Reply