Compare with custom skin mobiles, Most of the Stock Android mobile didn’t face freeze and stuck issues often. It is due to there is no need to pass through the UI skin. But it doesn’t mean, It is not free from stuck issues. Fortunately, We can fix most of the software-related issues by ourselves. Moto G8 Plus came with Pie 9.0 version and got an Android 10 version. You may face stuck or freeze when handling heavy apps or after the massive update. When your Moto G8 Plus is stuck on the boot logo, You can fix your mobile using one of the below methods.
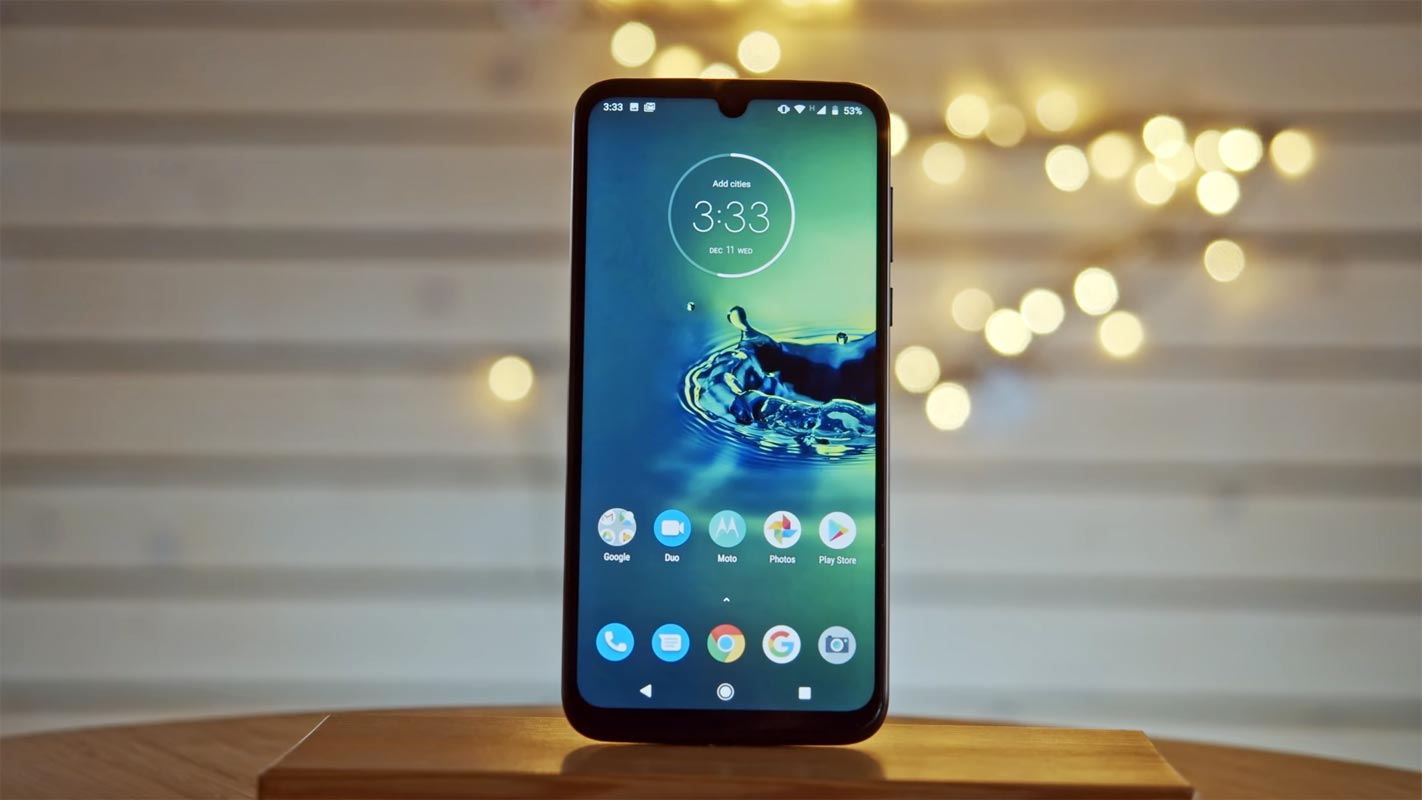
When the issue happens after restart or update, most of the time, you can fix the problem with few steps. Always start with method 1. Based on your mobile feedback, you can go further steps. When you are facing freeze issues, You can try different modes other than the following ways. The next process is purely for the Boot logo stuck in the start screen.
What is the Stuck on the Boot logo in Motorola Moto G8 Plus 2019?
OTA updates are, most of the time, flawless processes. But when the mobile begins to finish the first boot after the update, It is a nail-biting situation for most users. Because sometimes the boot can take a long time than usual. If the boot happens after a long time, it is excellent. But When the boot takes more than 20 minutes and is stuck on the Moto G8 Plus name logo, It is not a good sign. You can wait for a few minutes. Even after your mobile is not booted into the regular screen, your mobile is stuck on the Moto Boot logo. You don’t need to worry. We can start with simple methods to fix these issues. Always start with a simple process. Most of the time, the boot stuck fixed in simple ways.
Boot logo stuck can happen for various reasons and different situations. When you restart the mobile after the monthly security patch updates or major upgrades like Android 10, It can happen. Due to Overwrite already existing codes in the OS and the process doesn’t go as expected, We have to deal with this kind of problem. When you face this issue, Don’t rush for firmware flash, You will lose user data. The Firmware flash should be your last choice, and We can recover your mobile using different methods. The stuck can happen in two screens- The Moto Logo and The Mobile details screen logo. For both screens, the following techniques will work.
How to Fix Moto G8 Plus 2019 stuck on Boot logo?
When you give more time than usual, and your mobile won’t boot into System OS, you can follow the below methods to fix your stuck Moto G8 Plus 2019 on the Boot logo. Our motto is as much as we can retrieve your mobile without losing data. But when we can’t, we have to flash the full firmware to get your mobile back.
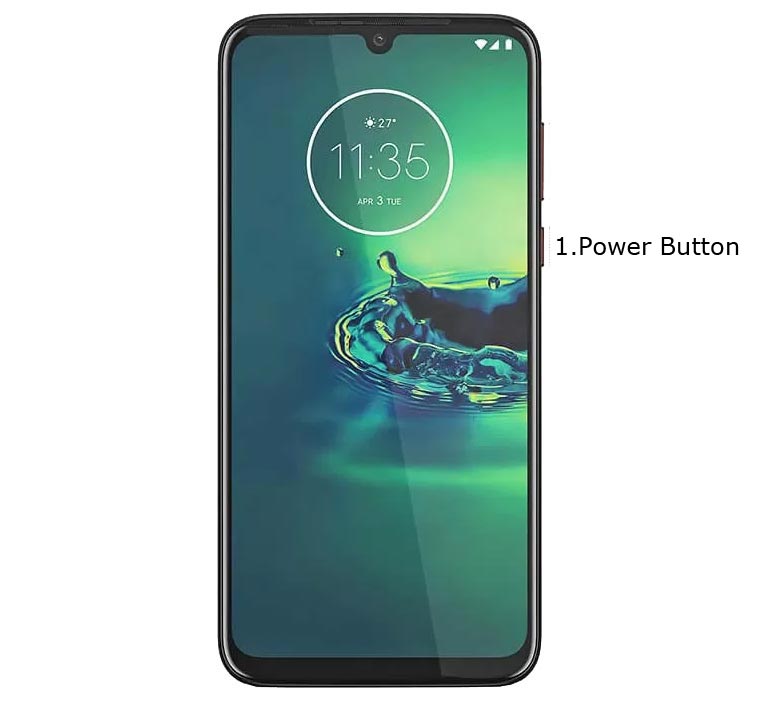
1. Long Press Power Button
Most of the time, all electronic devices will work after the power off and on. Even if it is a simple method, and you may wonder what technology can help here. It will work most of the time. Long press your power button for 10 seconds, It will trigger your mobile’s power, and your mobile will shut down in a few seconds.
2.Boot into Safe Mode
Sometimes third-party apps may trigger the latest version, and it may cause the stuck-in boot logo. Try to boot into Safe Mode by pressing Power Button for 30-60 seconds. Your mobile will boot into Safe mode. Try to Un-Install the recently installed app before the OTA process. Also, check the compatibility in Play Store. When you install apps other than Play Store, Un-Install them and try to boot again.
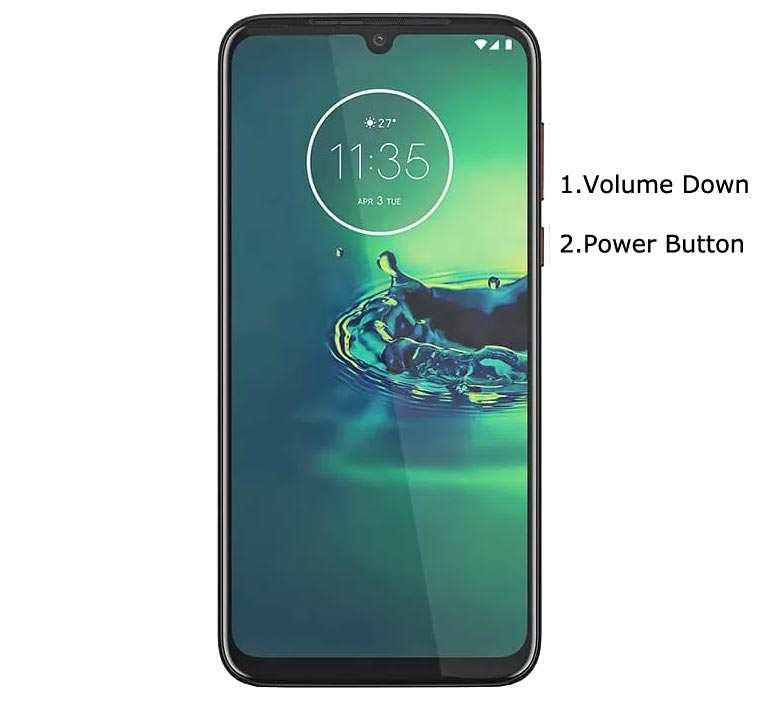
3. Reboot using recovery
This method will not affect your User data. It will only soft reset your mobile. You have to press Volume Down+ Power Button on your mobile for 7-10 Seconds to boot into recovery mode. After that, it will kick you into the recovery mode or directly boot into System OS. The response may vary depending on the mobile manufacturers. If you received a Recovery mode menu, use the Volume keys to navigate and the Power button to confirm the selection.
3.1 Stock Recovery method
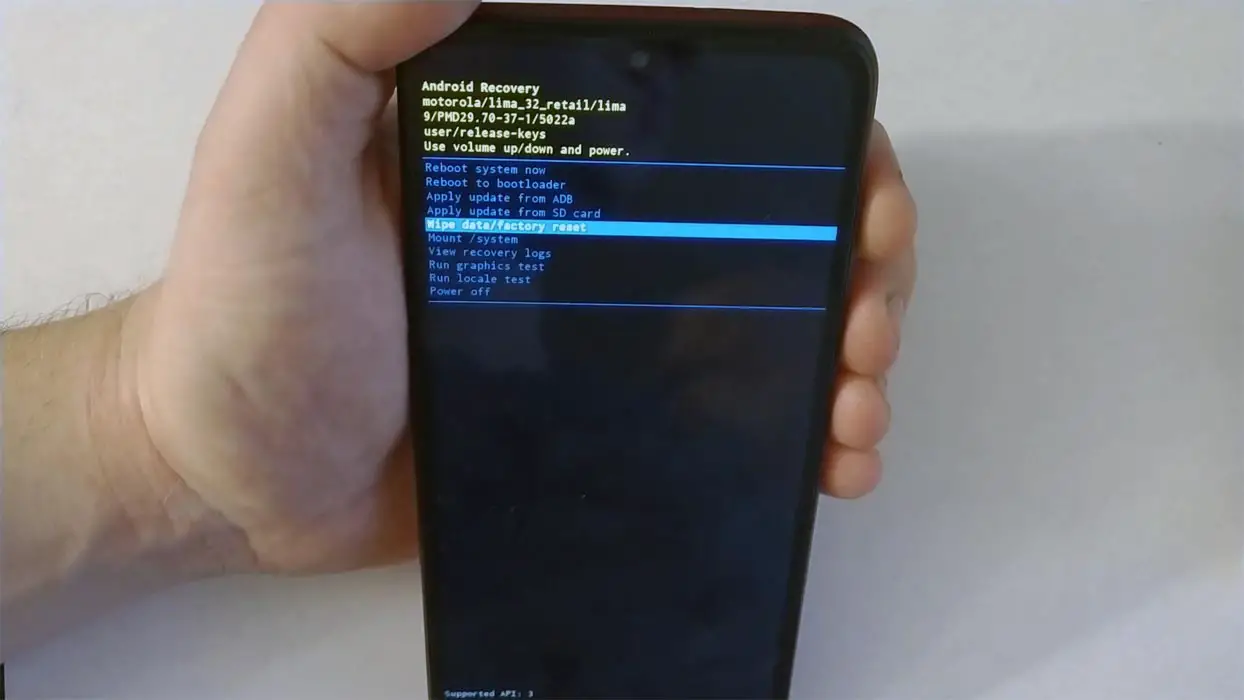
If you didn’t use Rooted mobiles, you have Stock Recovery, provided by your official mobile manufacturer. If you have stock recovery, you have the direct option as “Reboot.” Navigate to this option and confirm it using the power key button.
3.2 TWRP Recovery method
When you use Rooted mobiles, you either use Stock Recovery or TWRP custom recovery. If you have Stock Recovery, you can use the above process. When you installed TWRP on your mobile, follow the steps below.
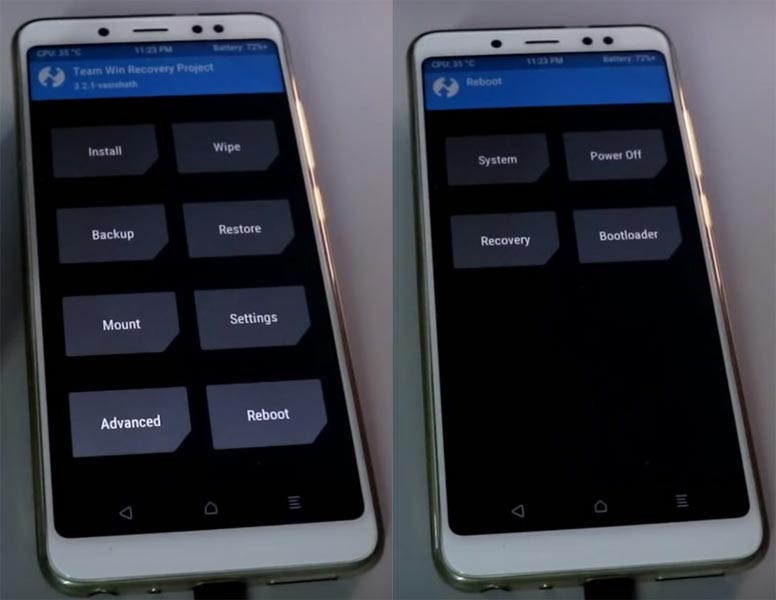
- The Keycombinations will boot your mobile into TWRP Recovery mode.
- On the Home screen, you can find the option “Boot.” Select the item; you will receive further options as System, Power Off, Recovery, and Bootloader. Select “System.” Your mobile will boot into Normal OS.
4. Using ADB Commands to Reboot, your boot logo stuck Moto G8 Plus Mobile
This process may work 50-60%. If you use Old Mid-range mobiles, the chances are less. But, When you have Flagship mobiles or New mobiles, it will work. The OS can still handle background commands. So, the ADB commands may work.
Steps
- Download the ADB drivers. Install it on your PC.
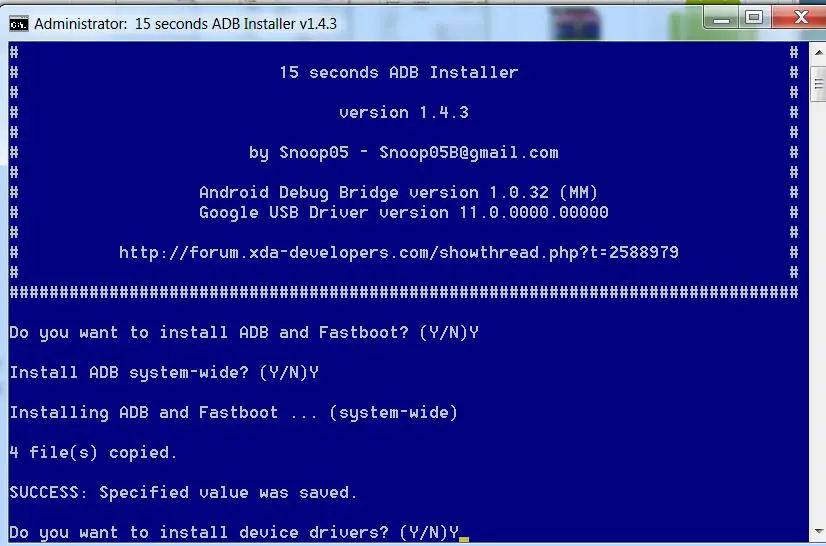
- Connect your mobile with a PC.
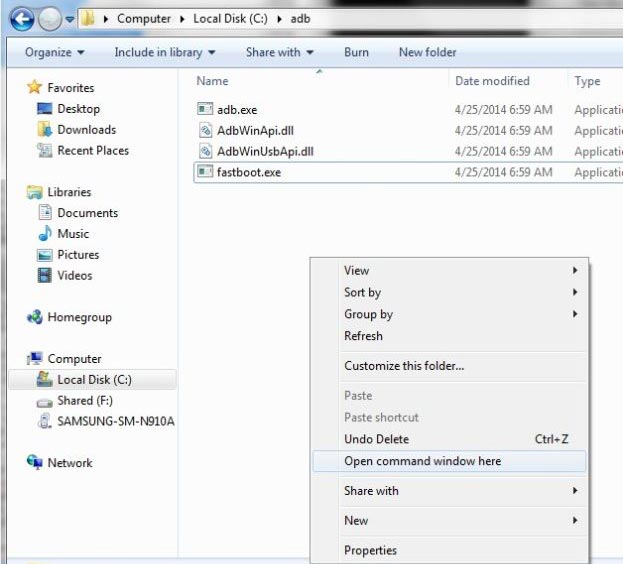
- Open a command prompt as Administrator and type the below command to check the ADB status.
- adb devices

- It should display the connected devices. If you didn’t get the mobile, restart the command prompt and Disconnect and Connect your mobile. If you are detected, type the below commands.
- adb reboot
- The order will reboot your mobile.
5. Drain Battery Completely
When You can’t Power off or Restart your mobile, Let the battery drain completely. Because with the massive battery, it may take 1-3 days, depending on your mobile battery backup, to remain. When you didn’t have this much time and want to urge fix methods, you can proceed with other ways.
6. Wipe Cache Data Partition
When you perform, restart using recovery, and you can’t boot into OS again. In this situation, We have another choice of the fix by Wipe cache partition. It is also will not affect user data. It will wipe only cache data. You have to press Volume Down+ Power Button on your mobile for 7-10 Seconds. After that, it will boot you into the recovery mode or directly boot into System OS. The response may vary depending on the mobile manufacturers. If you received a Recovery mode menu, use the Volume keys to navigate and the Power button to confirm the selection. Remember, you should wipe only the cache partition, Not the Wipe Data/Factory Reset.
6.1 Stock Recovery method
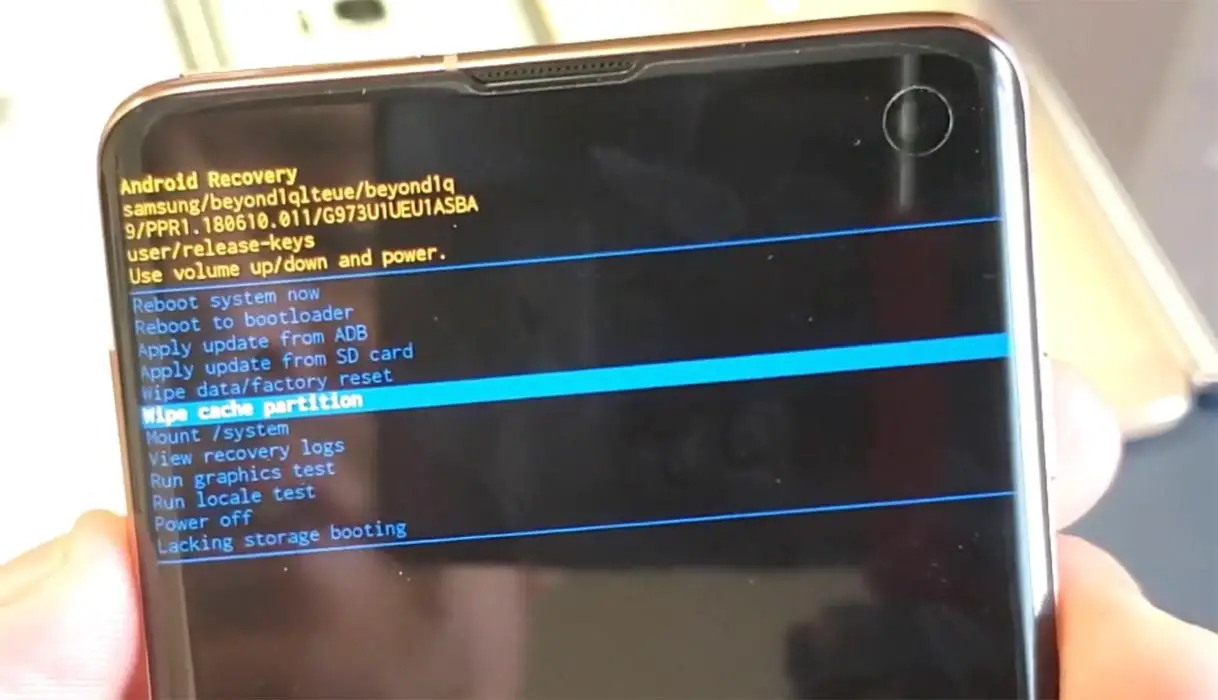
- If you didn’t use Rooted mobiles, you have Stock Recovery, provided by your official mobile manufacturer.
- If you have a stock recovery, you have the direct option as “Wipe & Reset.” Navigate to this option and confirm it using the power key button.
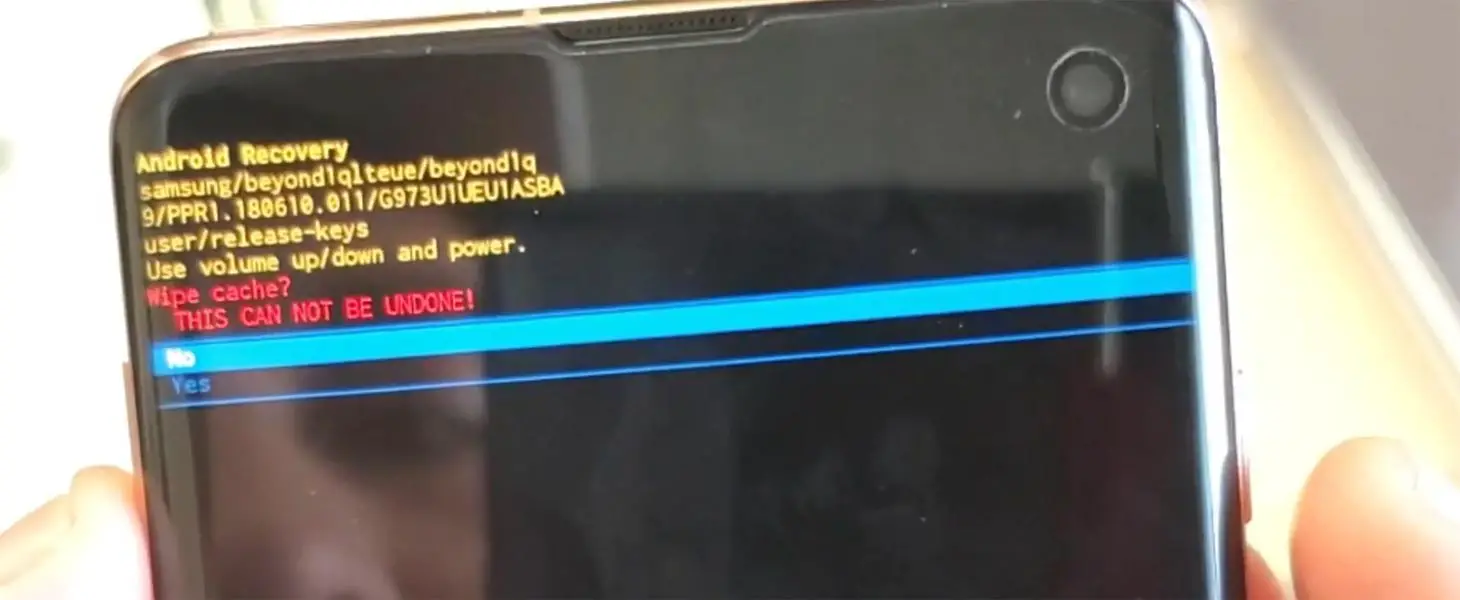
- Initially, try with “Wipe Cache.”
- It will ask you to confirm the process. Select “Yes.”
- When a cache doesn’t work, Go for “Wipe User Data.”
- Most of the time, it will boot into OS after the wipe. When it returns to recovery, Select the Reboot system now.
6.2 TWRP Recovery method
When you use Rooted mobiles, you either use Stock Recovery or TWRP custom recovery. If you have Stock Recovery, you can use the above process. When you installed TWRP on your mobile, follow the steps below.
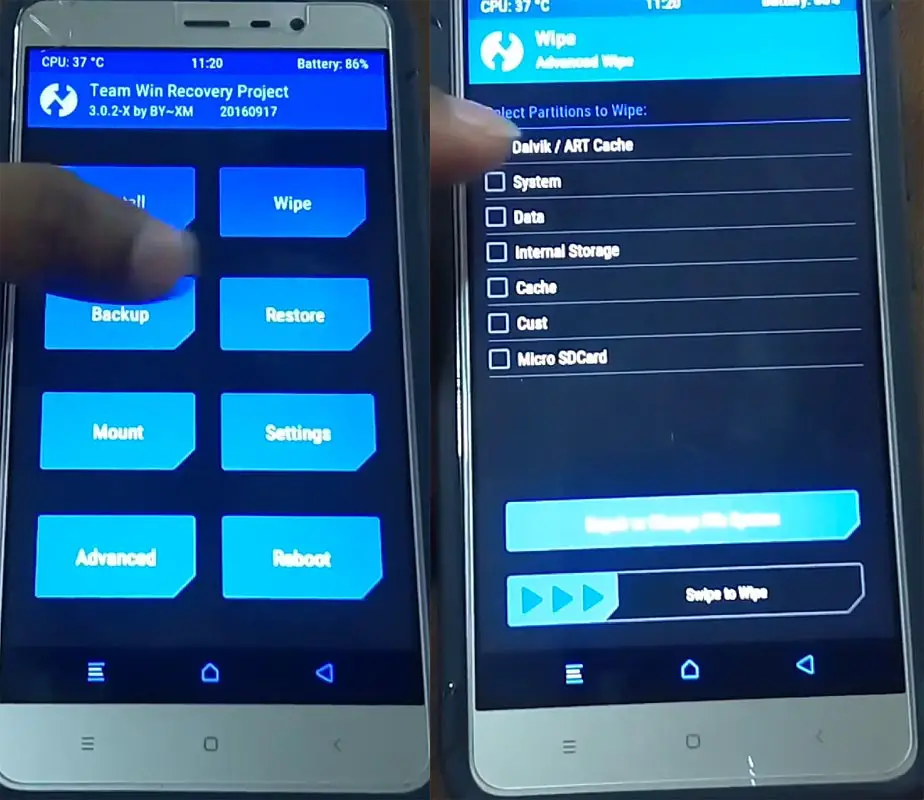
- The Keycombinations will boot your mobile into TWRP Recovery mode.
- On the Home screen, you can find the option “Wipe.” Select the wipe option; you will receive further details. Select “Cache.” Don’t select the System. It will wipe your OS. After selecting other choices, swipe to erase the data. When the process completes, return to home and boot into OS.
7. Disable Recently installed apps using ADB
If you use Stock Android phones, you can disable/remove the bloatware apps most of the time. If you are in Custom Skin OS, the chances of disabling the Bloatware apps are less. But, We can Disable the Apps using ADB without root. The methods may vary depending on the manufacturer. You have to find the particular Bloatware apps and disable them. I will give the overall idea about ADB steps and commands. But, the list of packages may vary depending on the manufacturers.
- Download the ADB drivers. Install it on your PC.

- Enable USB Debugging Mode and OEM Unlock; you’ll find these options at Settings >>> Developer options. If you didn’t see the developer options on your settings menu, go to about >>> build number. Click on the “Build Number” row about ten times regularly to activate the “Developer Option” on your device.
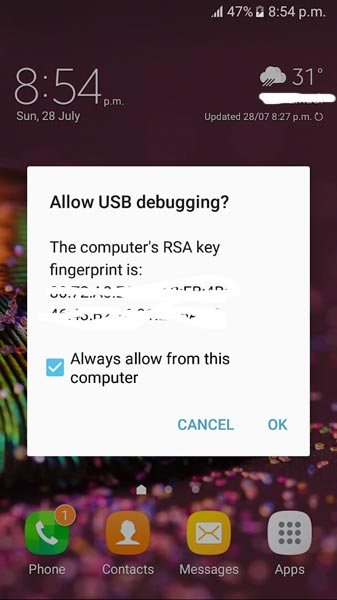
- Connect your mobile with a PC and unlock your mobile (Screen Lock).

- Open a command prompt as Administrator and type the below command to check the ADB status.
- adb devices
- The above command will display some code for device detection. If you didn’t receive any response, Check with the USB Cable. If you get a response, move to the below commands.
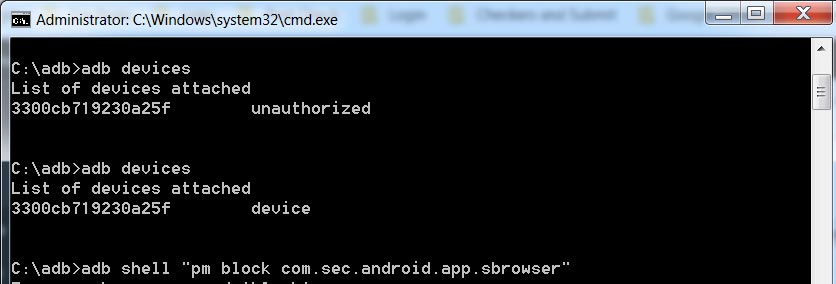
- You can disable the apps based on their adb package name. You can find these package names using the below command.
- adb shell pm list packages
- Based on the title, you can exclude unwanted apps. After that, use the am force-stop and pm disables commands with the Application package name.
- You can enter the commands one by one, Or All commands, and Hit Enter. You can get the application package name in Play Store URL. It will start with com.instagram.android like that.
- am force-stop package name(e.g: com.sprint.w.installer)
pm disable-user package name
- Restart your mobile. When you are again stuck on boot logon on your Moto G8 Plus Mobile, move to different methods.
8. Flash Boot. img file using ADB and Fastboot and Repair Boot logo stuck in Moto G8 Plus
The main problem of stuck in the boot logo is with the boot image file. When we flash the particular boot image file, then we can restore your mobile without losing data. But you should know what version of the software is already on the mobile. You can always go with the latest boot image file. The following method may not work with EU carrier-locked mobiles.
-
Download the ADB drivers. Install it on your PC.
- Download Moto G8 Plus firmware from the below links and save it on your PC. Your Current OS version and Downloaded Version AP and CSC should be the Same.
8.1 Extracting boot.img file
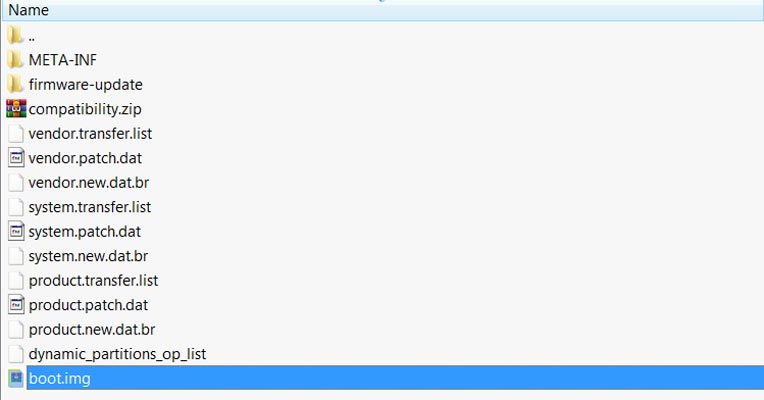
- Download 7Zip-ZS and Install it on your PC. Extract the files in downloaded firmware using 7Zip-ZS. You will get ROM files. In those files, along with some data, you can see boot.img.
- Copy the boot.img to ADB Installed folder.
8.2 Flash boot.tar using ADB and Fastboot
- Connect your USB cable with your PC. Switch off your device. Then, enter into Fastboot mode. To do this, press and hold Volume Down+ Power Buttons and Connect Your Mobile To PC via USB Cable; after Moto Logo Appear, Release all keys.

-
Press the Volume Up button to continue when you see the warning message.
-
Now, connect the Moto G8 Plus Mobile to the USB cable computer.
-
Launch the fastboot on your computer. Open a Command prompt on your PC and type the below command.
- fastboot devices
- It should display the connected devices. If you didn’t get the device, restart the command prompt and Disconnect and Connect your Moto G8 Plus. If you are detected, type the below command and hit Enter.
- fastboot flash boot boot.img
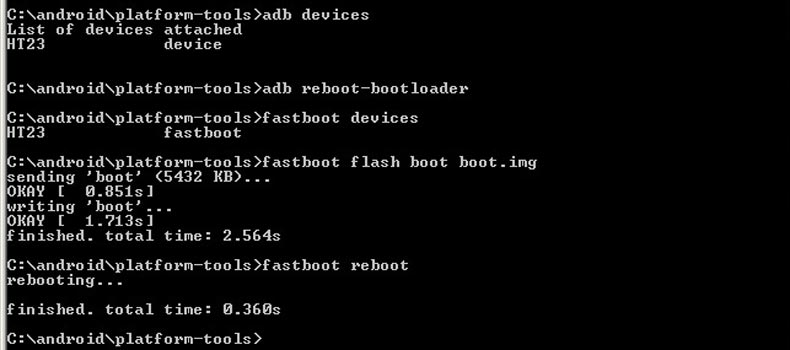
- After the process complete, Press the Volume Down+ Power button to exit Fastboot mode. When the screen goes off, Immediately Press Volume Up + Power buttons to boot into Recovery mode.
- After entering into Stock recovery mode, Go to Wipe Data/Factory Reset and Select Yes to wipe data. It will erase your saved data on your device. Don’t Boot into OS; read below Boot stages before booting.
9. Flash Complete Firmware using RSD Lite
We are going full flash firmware in your boot logo stuck Moto G8 Plus Mobile in this method. It is a Data loss process. When you didn’t have any choice and none of the above methods didn’t work for you, you can use it. Refer- Moto G8 Plus 2019 Firmware.
9.1 Flash Moto G8 Plus Android 10 ROM using RSD Lite Tool
- Download the Motorola USB driver and install it on your PC.
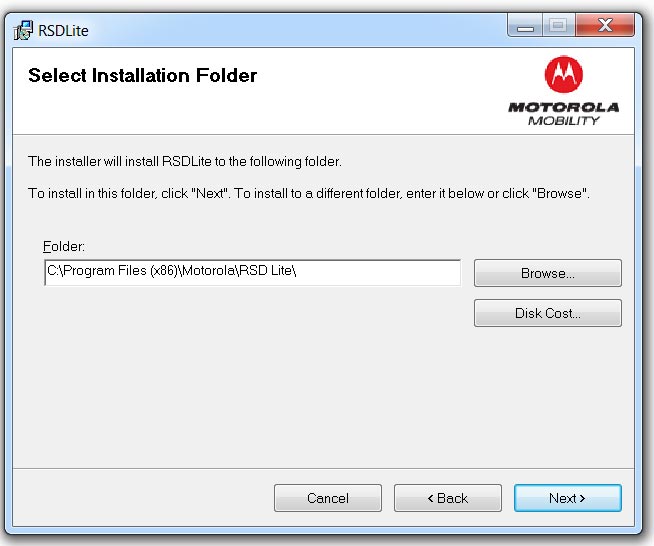
- We are using third-party software flashing. Download RSD Lite and install this also on your PC.
- Connect Your Mobile With the PC Using USB Cable.
- Switch off Your Mobile and Enter into Fastboot Mode->Press and Hold Volume Down+ Power Button.
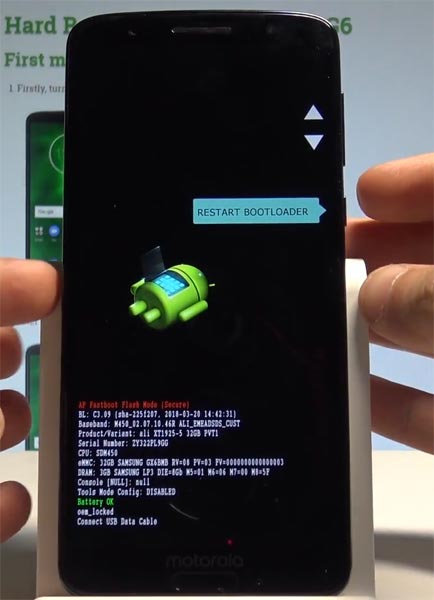
- Release all the keys when you enter into Fastboot mode.
- Now Launch RSD Lite Select Your Downloaded Firmware Using this “…” The symbol in the RSD Lite.
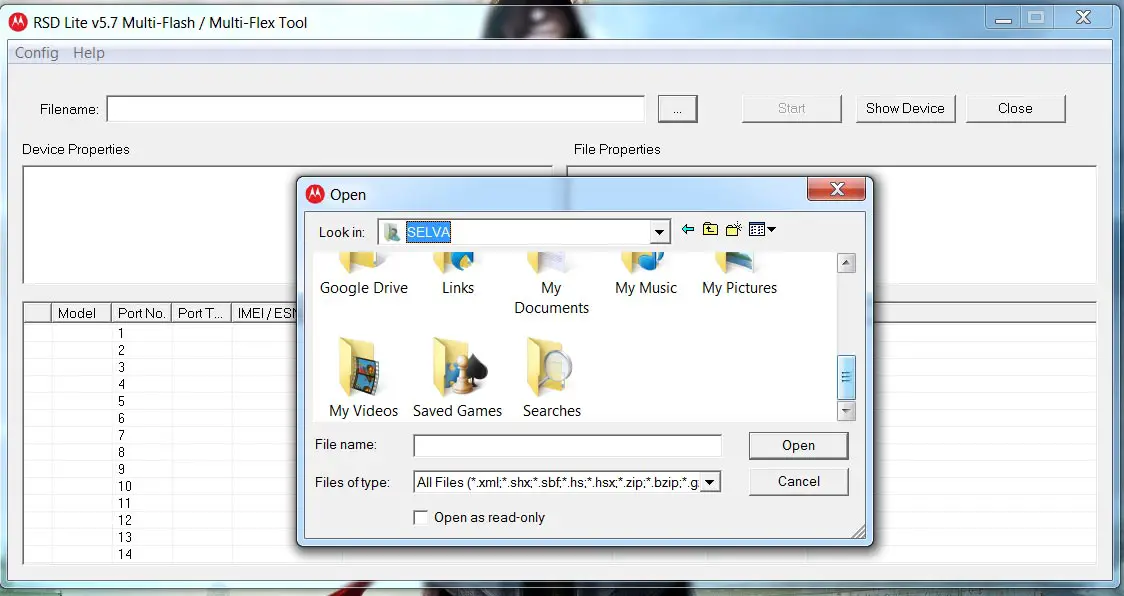
- It Will Asks For the Unzip Just Select Uncompress.
- Check With Your Mobile Details.
- Now go to Your Mobile Press Volume Down Key And Select AP Fastboot. Make Sure that USB Connected Message is Display(Transfer Mode: USB Connected).
- Now Select the Start in the RSD Lite Wait For the Process to Complete, Your Mobile Will Reboot After the Process Completion.
- You can Check the Firmware Details->Settings->About->Version.
Wrap Up
Even if the software updates process looks like a simple way, Mostly, 1-5% of people always face issues when they try to make OTA updates. That’s why we suggest you should always make a backup before making an update on your mobile. Always use cloud photo backup services like Google Photos. Compare with other mobile manufacturers, with the help of Motorola’s available tools, we can fix your Moto G8 Plus stuck on the boot logo.
If you face freeze and unresponsive issues on your mobile, You should try different methods than the above mentioned. It is always a wise idea to give some time for the first boot after the update. Based on your available storage and apps size, the first boot may take a long time. When you are confident that the mobile is stuck and already gave enough time for initialization, you can follow the above steps to fix your mobile. When you try different methods than above and those techniques help you, Comment below. We try to add if those methods work for everyone.

Selva Ganesh is the Chief Editor of this Blog. He is a Computer Science Engineer, An experienced Android Developer, Professional Blogger with 8+ years in the field. He completed courses about Google News Initiative. He runs Android Infotech which offers Problem Solving Articles around the globe.


Leave a Reply