ODIN is a specified flashing tool for Samsung mobile phones. The app is straightforward, so even a novice can download and flash the device without any tutorial. While other mobiles have regular fast boot-to-flash TWRP or firmware, Samsung has a unique and easy method compared to other mobiles. Samsung Odin 3, or Odin (for short), is the official Samsung firmware flashing tool for computers running on Windows OS. Here, we listed all the old and latest Android: 14, 13, 12, 11, 10, Pie, Oreo, and Nougat. The ODIN flashing tool is the best app for installing Stock Firmware or TWRP on any Samsung mobile device. Interestingly, all the versions of the Odin app are available for free; you only need to download it from a verified source/host website.

Samsung Odin
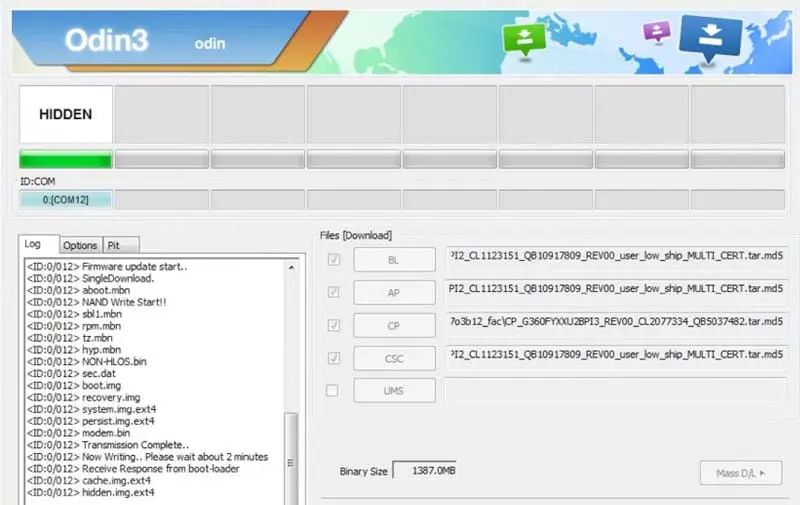
The Odin flash tool makes installing firmware binaries (BL, AP, CP, CSC [CSC and HOME_CSC], and PIT) or recovery images with .tar or .md5 extensions effortless. Unfortunately, Mac users can’t use this tool specially made for Windows OS.
Furthermore, ODIN is the best tool for flashing firmware and root files or installing custom ROM on Samsung mobile devices. We will list all the versions of Odin, including the customized ones. Rooting a Samsung device is more comfortable when you use the Odin app. However, while many Android devices are out, a Bootloader Mode and other modes like Fastboot and Recovery are embedded into a single interface. Samsung Galaxy devices seem different as you’d instead hold down a couple of buttons to boot the device into Download or recovery mode.
Supporting Versions
-
All Samsung Galaxy series.
Pre-requisites for using the Odin App
To serve as a guide, before you use the Odin app to flash or root any Samsung mobile device, take note of the following things;
-
The Samsung device must have a battery percentage above 50%
-
Back up the files and everything on the device.
- Install Samsung USB Driver.
Download Odin All Versions (Android 14, 13, 12, 11, 10, Pie, Oreo, Nougat)
-
v3.12.5 ( Nougat Android version)
-
v3.12.7 (Oreo Android version)
-
v3.13.1 (Pie Android version)
- v3.14.1 (Android 10 version)
- v3.14.4 (Android 14, 13, 12, 11 version)
-
Modified Odin (Nougat/Oreo/Pie Android version)
-
Prince Comsey Odin (Nougat/Oreo/Pie Android version)
- Patched Odin (For US version Mobiles)
How do you root a Samsung device using Odin?
- The Following Steps are like an Overall map; Each device requires a different approach.
-
Enable USB Debugging Mode and OEM Unlock; you’ll find these options at Settings >>> Developer options. If you didn’t see the developer options on your settings menu, then go to about >>> build number; click on the “Build Number” row about ten times regularly to activate “Developer Option” on your device.
-
Download and install the Samsung USB driver to your computer system.
-
Install ODIN on your PC and download the software. In the ODIN list, select the above Oreo version.
- Download forced_encryption_disabler, Bypassate BBypass, and Copy them to Your SD Card Memory. We Need to flash RMM State to avoid OEM Lock automatically in the future after the Root process, and no-verity-opt-encrypt; copy them to Your Phone Memory. We Need to flash encryption disabler to avoid Boot Warnings in the future after the Root process. Copy all these files to the external SD Card.
- Download Magisk Manager (The Latest version) or Magisk Canary and Install it on your mobile external storage.
- You should download the TWRP file based on your model number.
-
Switch off the mobile device.

-
Boot into download mode by holding down the Volume Down + Power Button at the same time.
-
Press the Volume Up button when you see the warning message to continue.
-
Launch the Odin app, which you must have installed on your computer, then connect the Samsung device using a USB Cable.

-
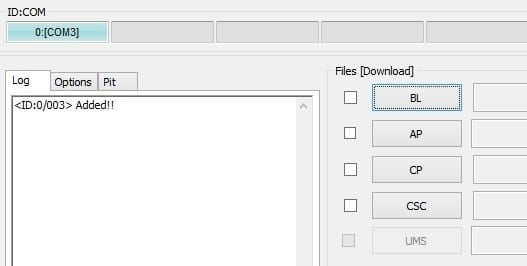
You should typically see an “Added!!” message to prove your device is successfully connected to the Odin app. Retry the steps above if you don’t see this “Added” message.
-
Click on the PDA or AP to get the TWRP file from your computer and send/install it to the Samsung device.
-
Also, navigate the “Options” tab and un-tick on “Auto-reboot.”
-
Click “Start” to install the file on the device.
-
You are Done.
Install Magisk, no-verity-opt-encrypt, forced_encryption_disabler, and aBypassState BBypasson your Samsung Galaxy devices using TWRP.

- Boot it into recovery mode->Volume Up + Power Button.
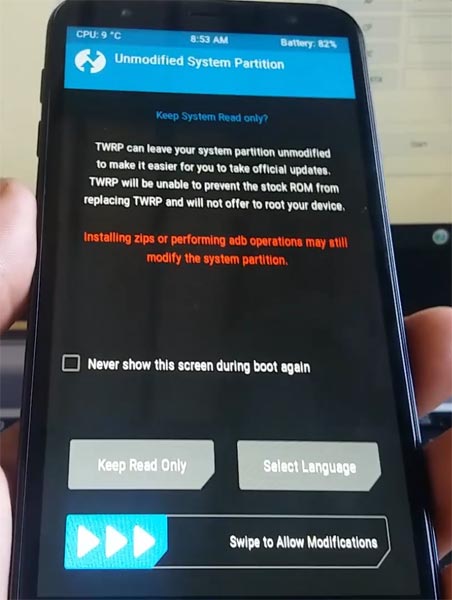
- Now, it Will Boot into TWRP Recovery Mode.
- Select Wipe->Advance Wipe->Select Cache Data.
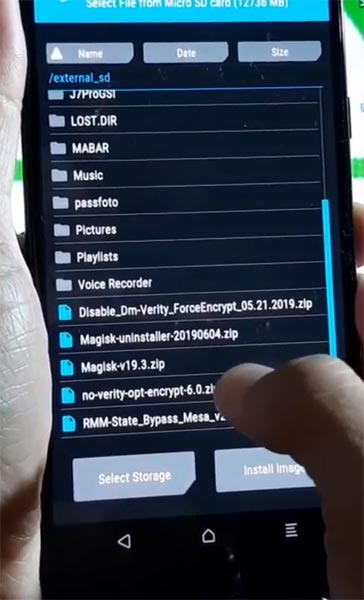
- Return to Home of TWRP and select Install.

- Select forced_encryption_disabler.zip.
- Return to Home of TWRP and select Install.
- Select RMM State By-Pass.zip. Same process on no-verity-opt-encrypt and Magisk installation.
- You should Install them One by One. Don’t use the add more zips feature in TWRP. After the Installation, Reboot Your Mobile.
- You can also install Magisk.apk on your mobile applications. No-verity-opt-encrypt is used to avoid the Encryption issue after rooting. You can check your root status using Root Checker.
- If you didn’t find Magisk in the App Drawer, you should repeat the process from OEM fix installation.
When the device restarts, you will find an app called Magisk, which manages root access on Samsung Galaxy devices.
How to uninstall bloatware apps/preinstalled apps?
To achieve this, your device must be rooted. Follow our link to install the Root Cleaner app. Download Root Cleaner. After the installation, select “Uninstall” to eliminate all the unwanted apps on your device.
Note: Be sure to check the app you are uninstalling. Uninstalling a sound system or OS app will affect your mobile device.
Furthermore, with this app, you can quickly move all the apps installed on your Phone storage to an external SD card. However, this depends on your system permissions.
How to Unroot using Magisk?
-
Launch Magisk, go to Home (Scroll Down) >>> Uninstall >>> Completely Uninstall.
-
Your device will be unrooted within a few seconds.
-
Uninstall the Magisk app after the action. Download Root Checker to check root status.
Wrap up
The steps/processes to install or flash anything into Samsung devices are the same when you use the Odin tool. New devices need patched boot images, which should be flashed before this process. So, you should download your current firmware file, Patch your AP File, and flash it with other firmware files. After this process, you can Install TWRP based on your model number. If you face any problems during this process, comment below.

Selva Ganesh is the Chief Editor of this Blog. He is a Computer Science Engineer, An experienced Android Developer, Professional Blogger with 8+ years in the field. He completed courses about Google News Initiative. He runs Android Infotech which offers Problem Solving Articles around the globe.


Leave a Reply