Samsung falls in Android due to competition. Other than this reason, they always try to produce their versions of Android. Samsung Galaxy Store, Heavily customized skin OS are some examples to prove this. So, To provide voice assistant experience, they released Bixby. It is not that much good, like Google Assistant. But, It has its unique features that are better than Google Assistant. Even if Samsung tries hard to push the Bixby as our voice assistant, we always prefer Google Assistant. Sometimes Bixby automatically popup on specific activities and interrupt us. So, If you want to disable Bixby temporarily or entirely, you can follow the below methods. You can also Remap the dedicated Bixby key to some other apps or Google Assistant.
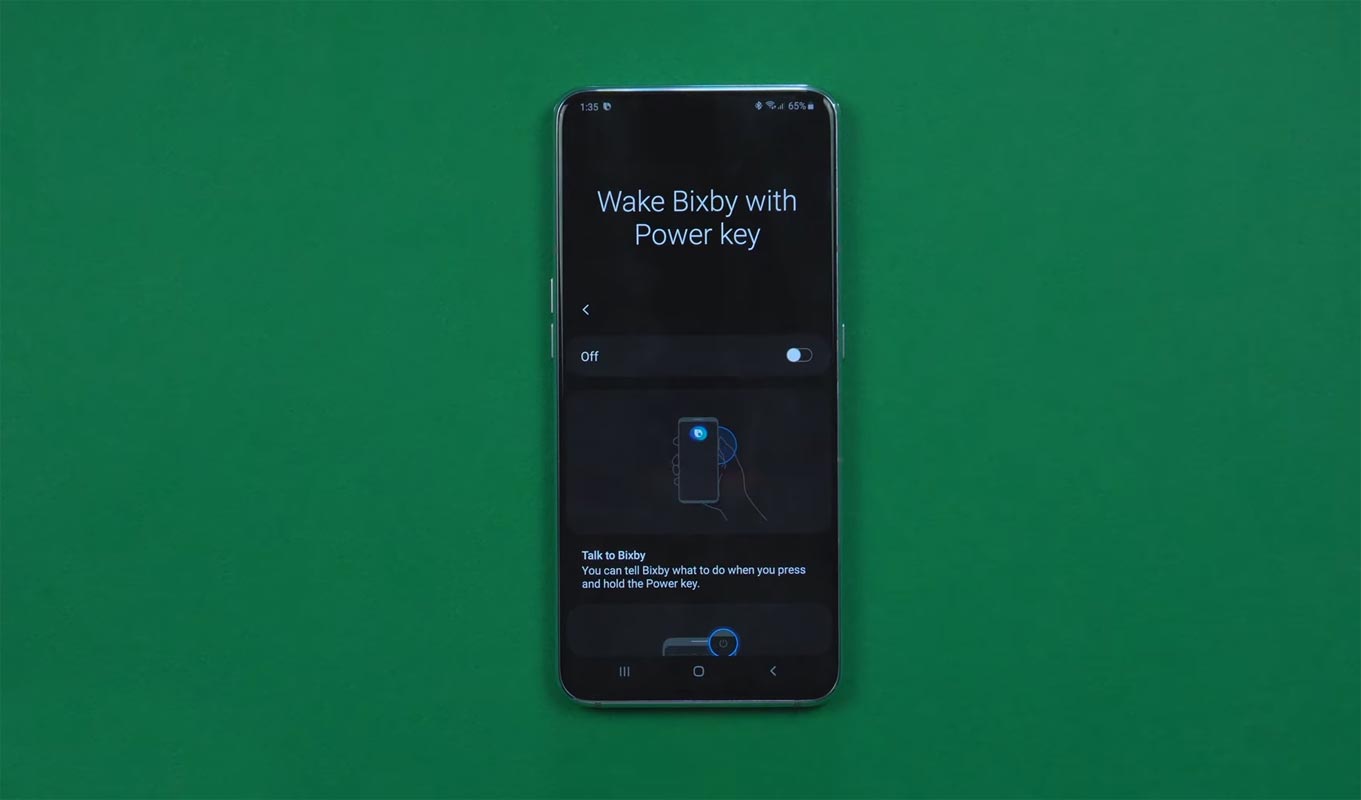
Don’t disable Bixby because somebody is saying it is wrong and worst. Try yourself with this voice assistant. In my experience, I found Bixby can do a lot of hardware controlling things that GA can’t do. So, based on your experience, you can take the decision.
Why Do We want to Disable Bixby?
Bixby is not bad. But, It is not that much user-friendly like Google Assistant and Alexa. But, Samsung keeps improving the data and working. Unlike both other voice assistants, Bixby is exclusive to Samsung mobiles. So, they try to keep improving features, and they have better control over their mobiles. But, most of us learned to use Google Assistant. When Bixby can’t give that many features, we started to hate it. Also, Samsung pushes a lot of actions to trigger Bixby in various places. It is annoying in real-time usage. Fortunately, Samsung officially allows us to disable Bixby. Also, we can remap it for other actions.
But, Bixby Can do a lot of things that Google Assistant can’t
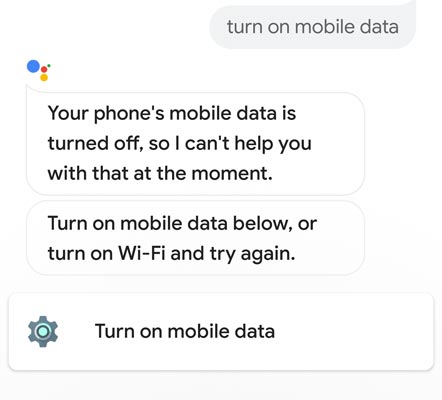
Yes, you read it right. I already covered the separate topic on Why Bixby is better than Google Assistant in some ways. Bixby can control some hardware things like mobile data turn on and off. It can also work without a data connection. Without the internet, GA can’t work and do simple things. For other mobiles, Google Assistant can do better. But when it is coming to Samsung mobiles, Bixby has its something to stand as best.
Disable Bixby Completely using Different Methods
After Samsung realize a lot of people prefer to turn off Bixby that affects the overall UI experience, they decided to give the option to disable Bixby from the default settings. The options may vary between Note series and S series. Based on your mobile model number, choose the appropriate one. We can’t disable Bixby using a single tap button. We have to use some steps to disable this voice assistant altogether. Some of the Samsung Galaxy “A” series mobiles also have Bixby. You can use the below methods to disable Bixby in those mobiles.
1. Samsung Galaxy Note 10 and Note 10 Plus
Both these mobiles don’t have a dedicated Bixby key. Instead of this, we can trigger Bixby by pressing the power button. So, We can easily change the side key to the Power button. We can also configure double-tap to opening Bixby/Google Assistant or other apps.
1.1 Steps- Side Key Configuration
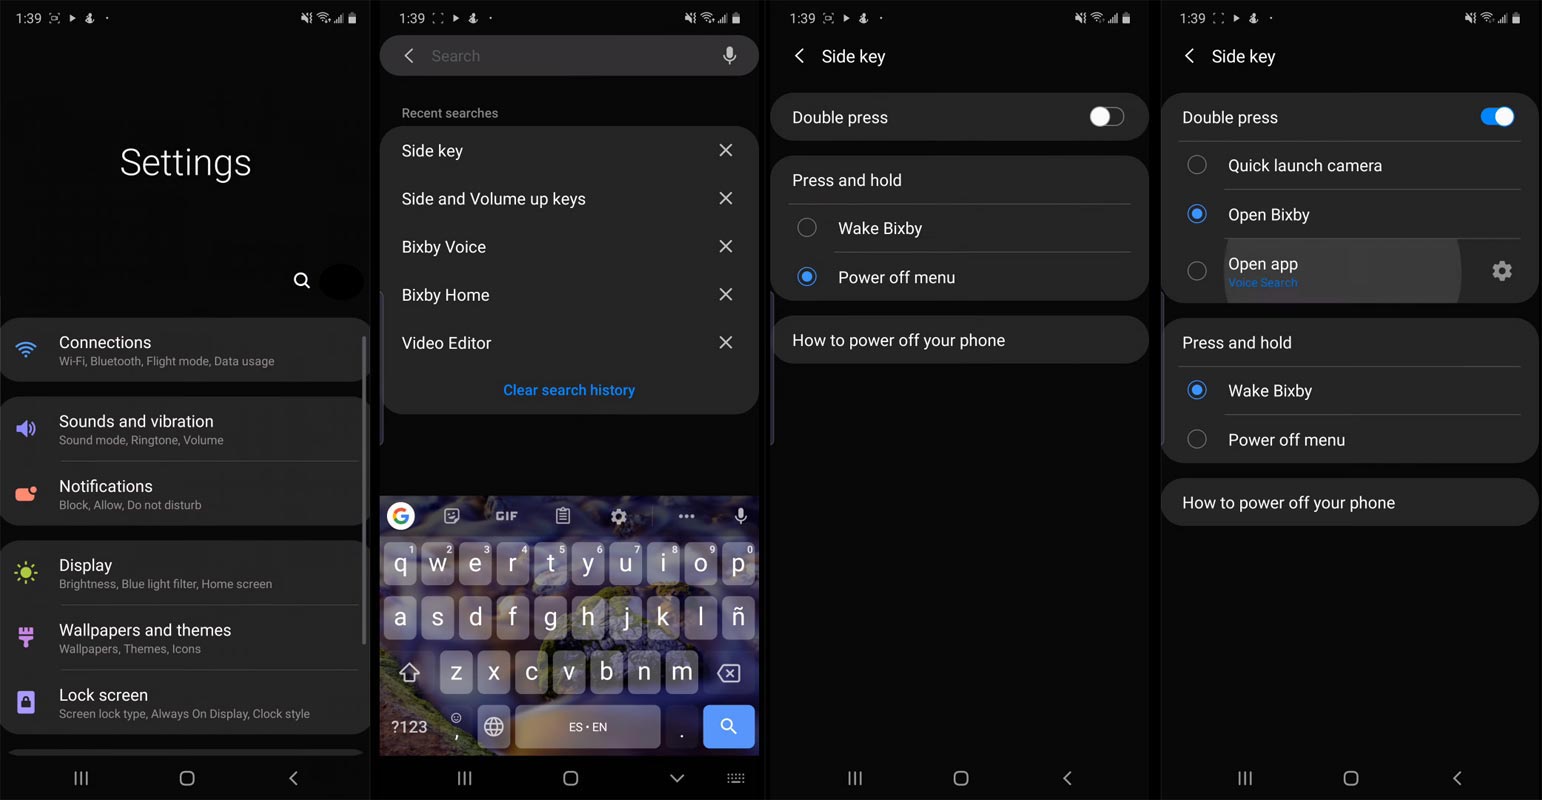
- Open Settings.
- Search for the term “Side key.” After receiving the search results, select the Side key menu. You will receive further options on this menu. You can also get this menu in the Advanced features.
- Select “Press and Hold,” Change the action to the Power button.
- You can configure the Side key using a Double press option. You can launch a camera or Open other apps.
1.2 Steps- Remove Bixby Home
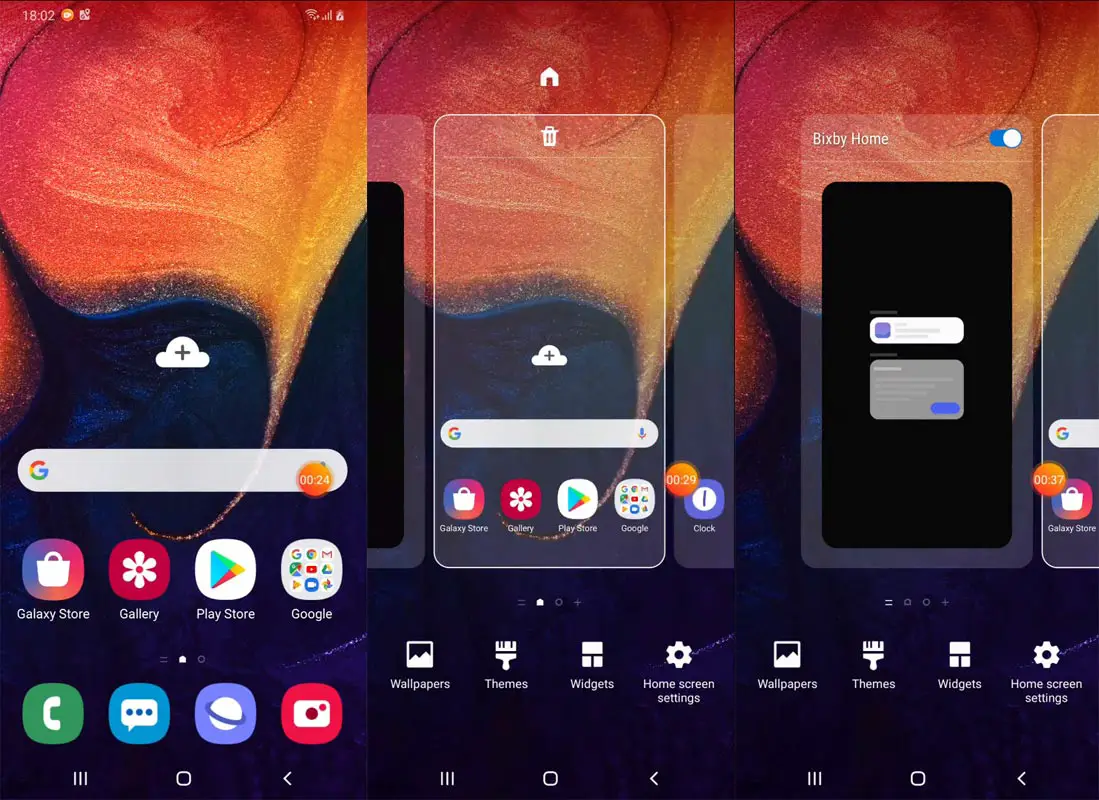
- Go to the home screen of your mobile.
- Swipe up, and you will receive multiple home screens to configure.
- Swipe left until you receive “Bixby home.”
- After getting Bixby Home to disable it using the tab button.
2. Samsung Galaxy S8 and S8 Plus/S9 and S9 Plus/S10(Plus and “e” variants)/Note 8/Note 9
If you have above mentioned mobile models, you should log in to your Samsung account before doing the below steps. You can sign in or sign up for your Samsung account in Settings>Account>Samsung.
2.1 Steps- Bixby Key Configuration
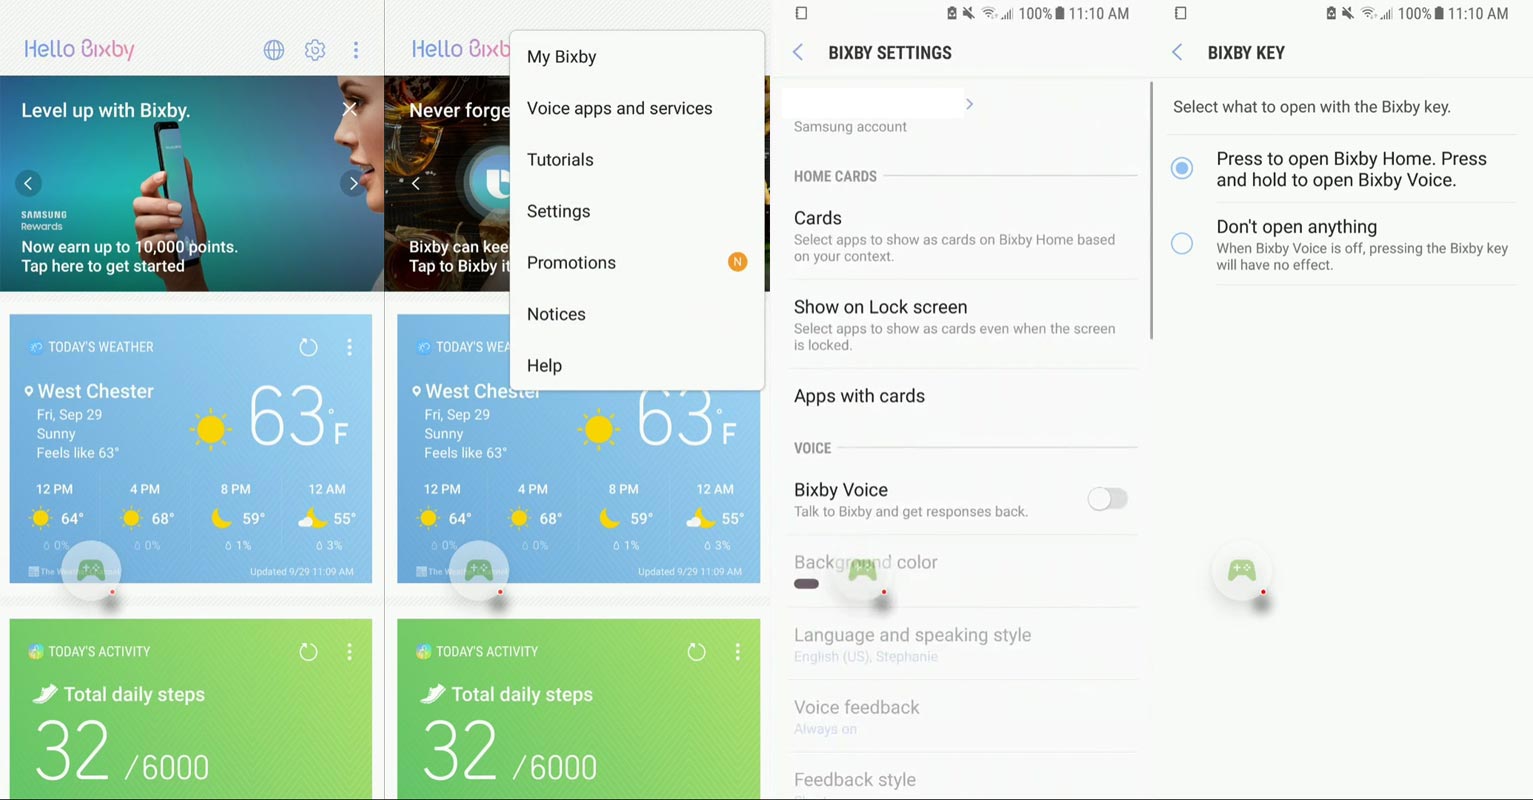
- Go to the home screen of your mobile. Press the Bixby key; It will trigger the Bixby page.
- Select the Gear icon and select Settings.
- Scroll down to the bottom and choose “Bixby key.” Then select “Don’t open anything.”
- After setup this setting. Now open your mobile Settings. Search for the term “Bixby Key.” Select Double-tap to open Bixby. You can also use third-party apps to configure the Bixby key.
2.2 Remap Bixby Key
- Visit the play store and place “Bixby remapper” in the search box.
- There are many apps available. Look for the Bixby button remapper in the options provided, download, and install it. You can select any app based on the ratings; Here, I chose the “Bixby Button Remapper” as an example.
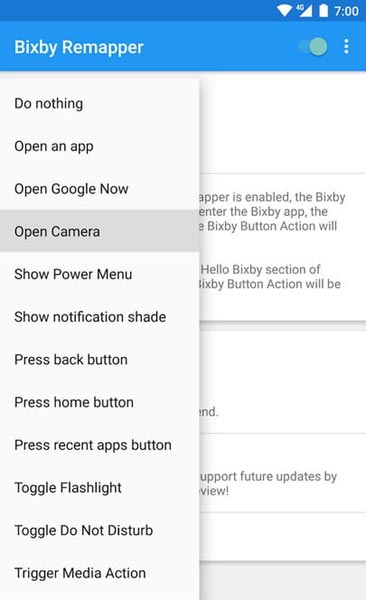
- After installation, launch the app, then press the sliding toggle at the top right corner of the screen to turn on the feature.
- You will be warned by the app not to make use of any other remapping software at this time.
- After turning on the feature, look for the three dots at the top and tap it.
- Choose Go to accessibility.
- You will find two options that control the app when you look under services here.
- They are named “more delay” and “less delay.” Choose less delay and slide the toggle to turn on.
- Once it has been put on, choose the Bixby button action.
- This will provide options for you to choose from. Here you will be able to decide what you want the Bixby button to do for you whenever you press it.
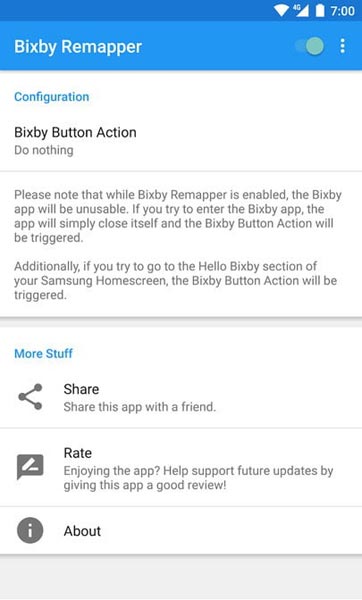
- Select Open Google now.
- Once you have done that, you can exit the app and check if it works by pressing the Bixby button.
- If it opens Google now an app, you will be able to make use of the Google assistant, and so, therefore, the procedure was a success.
2.3 Steps- Remove Bixby Home

- Go to the home screen of your mobile.
- Swipe up, and you will receive multiple home screens to configure.
- Swipe left until you receive “Bixby home.”
- After getting Bixby Home to disable it using the tab button.
3. Using third-party apps to Force Stop/Disable Bixby related apps
If you see the Bixby view and other apps trigger during different actions, you can disable them using third-party apps from Play Store. Follow the below steps to disable Bixby related family apps. By default, you can’t disable Bixby.
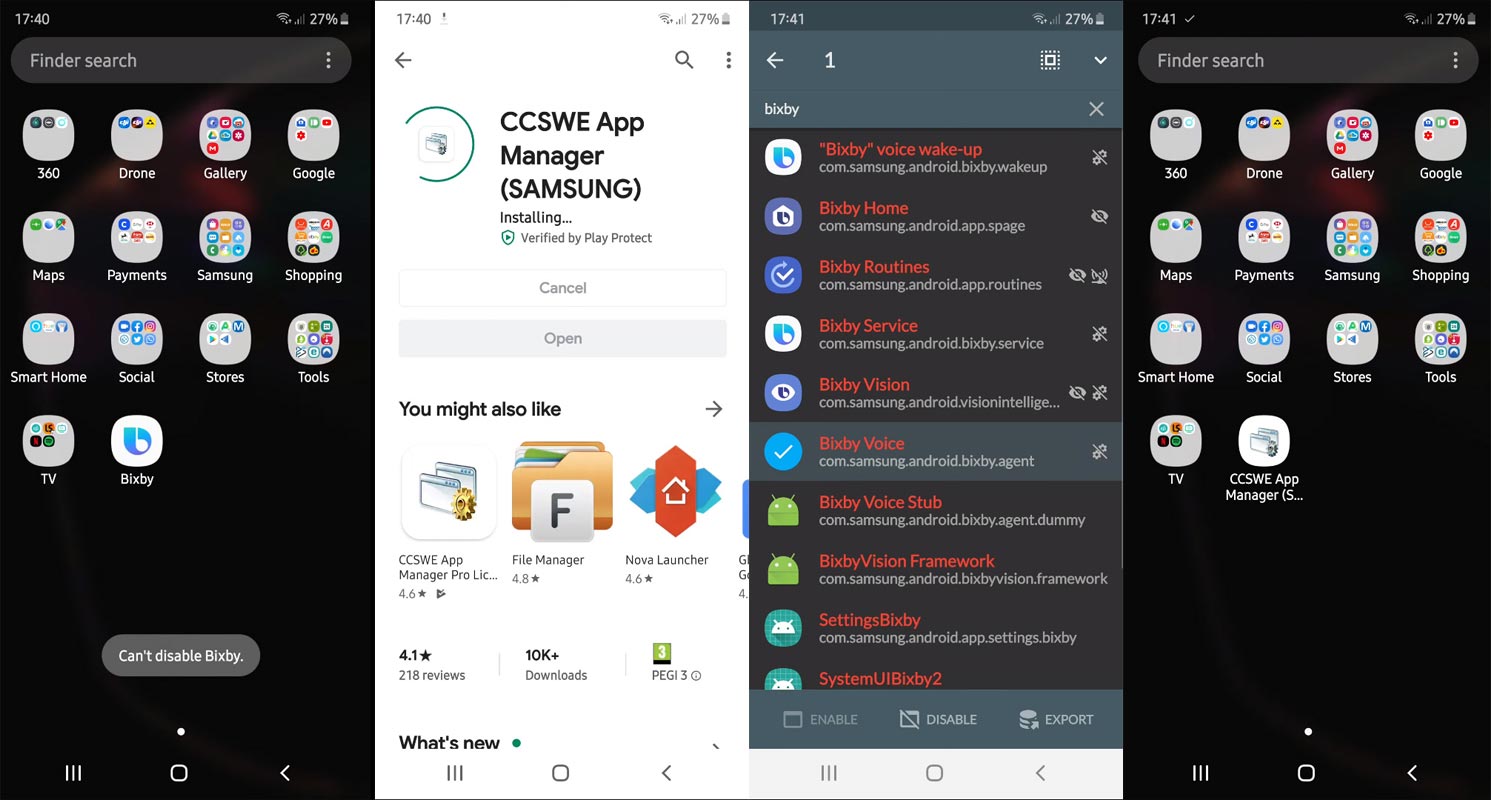
- Download CCSWE App Manager and install it on your mobile from Play Store.
- Open the installed app and search for the term “Bixby.” You will get a list of apps related to your search term.
- Disable the apps- Bixby Home, Routines, Voice Wake-up, Service, Voice. Don’t disable other apps. It will affect your UI.
4. Using ADB Commands
When you can’t satisfy by the above methods, you can use ADB to disable. You can disable not only Bixby but You can stop Knox also. I already covered a specific topic- Disable Samsung Knox and Bloatware Apps Without Root using ADB. The same way you can also disable Sprint and other carrier Bloatware apps, If you have carrier-locked mobiles.
Wrap Up
Don’t disable Bixby without trying it in your works. Because everybody is different. Who knows, Bixby can do some specific tasks better than Google Assistant. Compare with Bixby; Google Assistant has better management in Personal data. I didn’t force you. But when you feel it is annoying and not useful to you, you can always disable Bixby using above one of the methods. I listed based on the technical level. Always start with process 1. When you can’t satisfy, you can try with other methods. ADB method is like root level experience, So, When performing that method, take a complete backup of your mobile and Don’t disable other apps other than listed ones. As per my knowledge, I listed the best ways to Disable Bixby. When you used other efficient methods, comment below.

Selva Ganesh is the Chief Editor of this Blog. He is a Computer Science Engineer, An experienced Android Developer, Professional Blogger with 8+ years in the field. He completed courses about Google News Initiative. He runs Android Infotech which offers Problem Solving Articles around the globe.


Leave a Reply