Survival in the mobile industry is not easy. You must keep up with the trend and deliver the product as soon as possible. Or Else, your specs will be faded out by new improvements. The success of Motorola is they always provide better user needs for mobile devices and a reasonable price. Moto always releases mobile with Stock Android without heavy bloatware apps. Moto G62 5G comes with Android 12-based Stock Android. Since it already comes with Android 12, You don’t need to update your mobile manually. But when you face issues with your regular OTA methods, you can fix your mobile using one of the below methods.
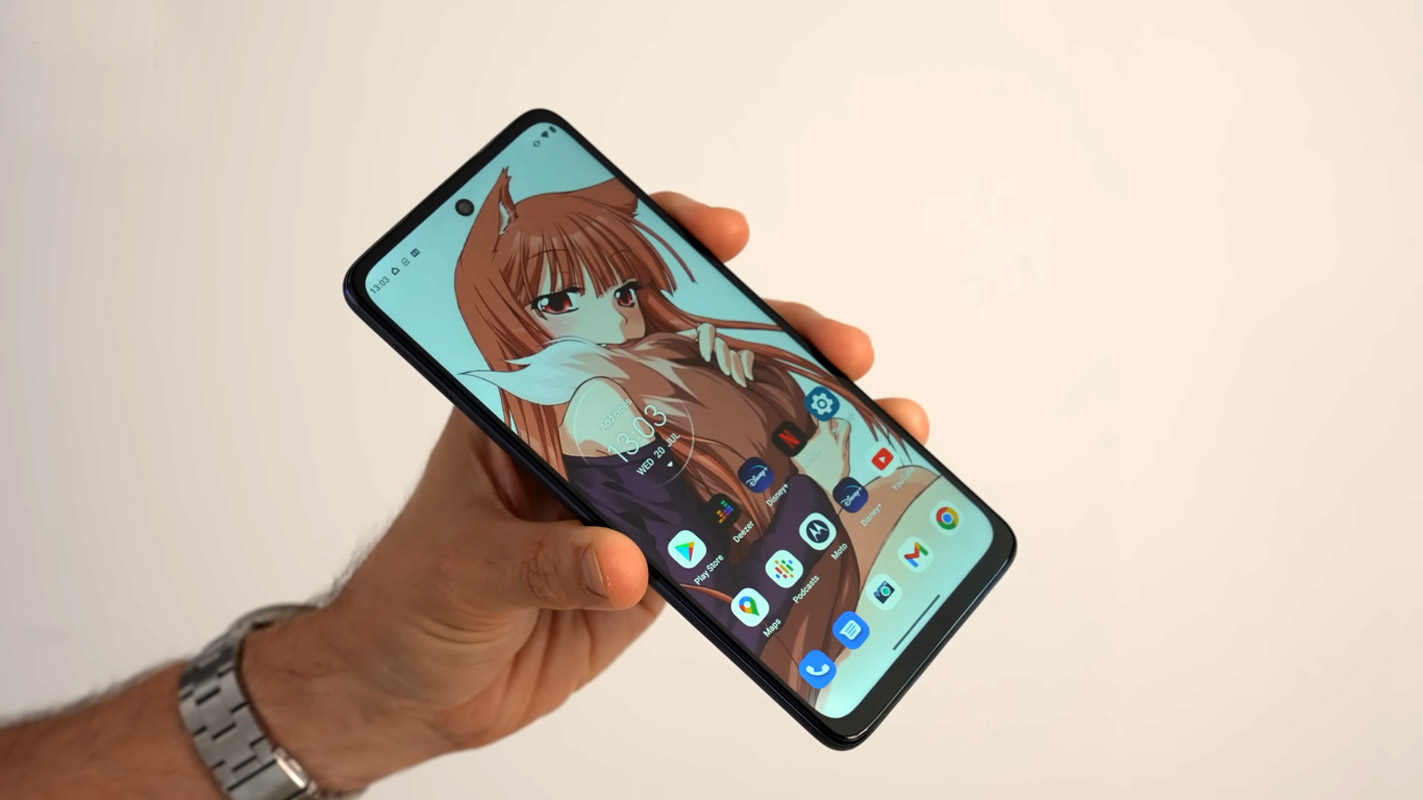
If the Internal way does not work for you, try the RSD Lite process. Most of the time, it gives you a high success rate. You can use the RSD Lite method when you accidentally bricked your mobile. You can use this method to Remove root access from your mobile and bring back Stock Recovery. There are a lot of features like Adaptive Brightness, Adaptive Battery, and a lot of UI enhancements.
Motorola Moto G62 5G Android 12 Firmware Flash (rhodec)
Official OTA Method
If you’re going to update a security patch to the current month, don’t go for the manual method. Try this Automatic method.
The process is straightforward;
-
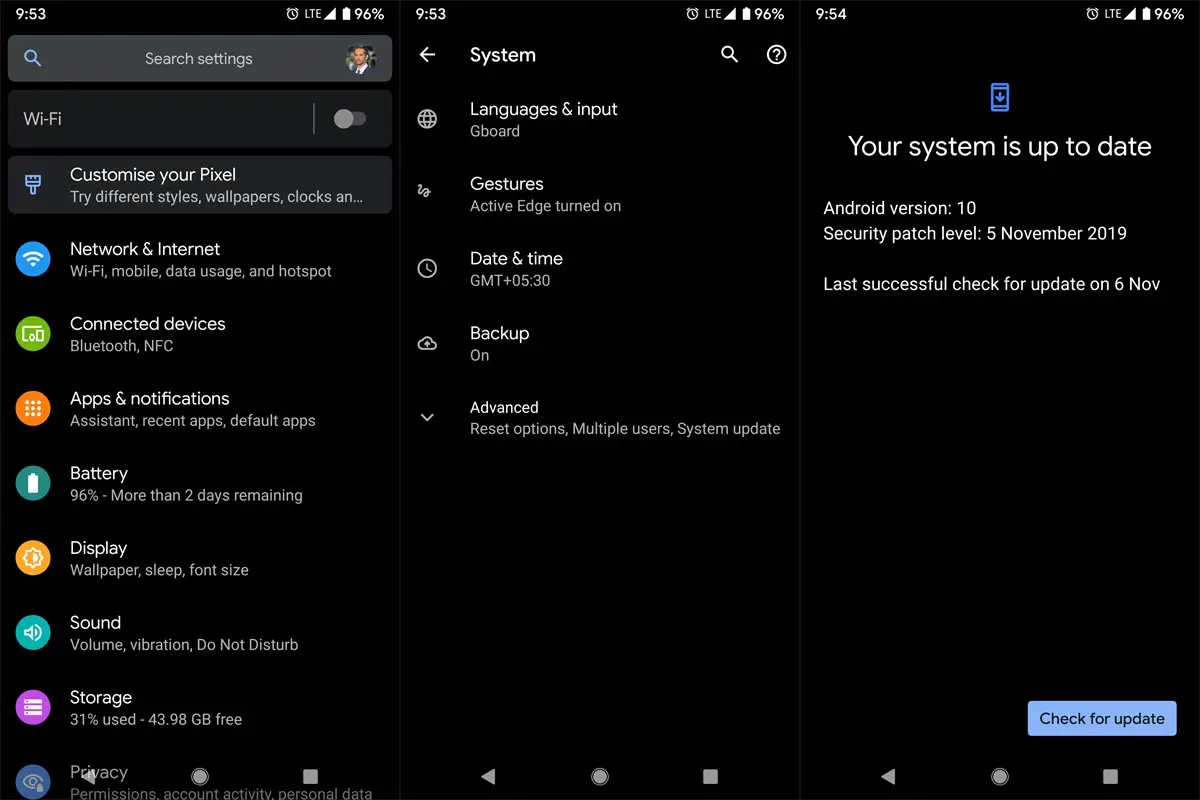
Go to your device setting menu and scroll down to the bottom.
-
Tap on “Software Update”
-
You may have to refresh the page to start the OTA upgrade process.
Motorola Moto G62 5G Android 12 Flash Manual Method (XT2223, International Variants)
Note
- Check Your Device Mobile No. If you flash a Different model number, you will lose some features based on your region.
- Battery Percentage Above 50.
- Backup Your Device.
Download Firmware
Using Internal Memory Method
This method doesn’t require PC support, download, and installs within your mobile. However, it will work only with Stock firmware installed on your mobile. If you are already using Custom OS, move to the following method.
- Copy downloaded firmware to your mobile, Rename it to Blur_Version.zip, and copy it to your Internal Root Memory. Copy>> Internal memory. Please don’t put it in any folder, and Don’t change the file’s name.
- Now Go to settings >> Apps and Notifications >> Show all apps >> Show system apps.
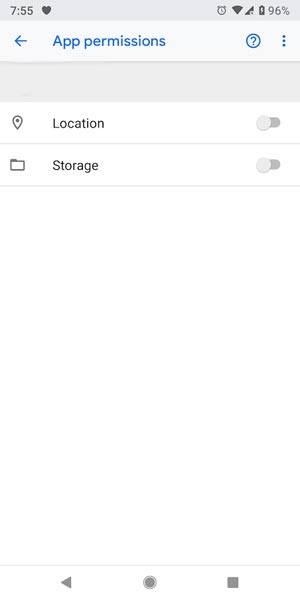
- Go to Motorola Update service >> Permissions >> Enable Storage permissions. After enabling this Permission. Now update as usual OTA Method.
-
Go to your device setting menu and scroll down to the bottom.
-
Tap on “Software Update”
-
You may have to refresh the page to start the OTA upgrade process. Instead of downloading from Server, this update process will update your Internal memory.
Using ADB and Fastboot method
This method requires PC support; You can also use this method to use Stock ROM If you are using Custom ROMs.
-
Download and install the Moto USB driver to your computer system.
-
Also, download the ADB drivers. Then, install it on your PC.
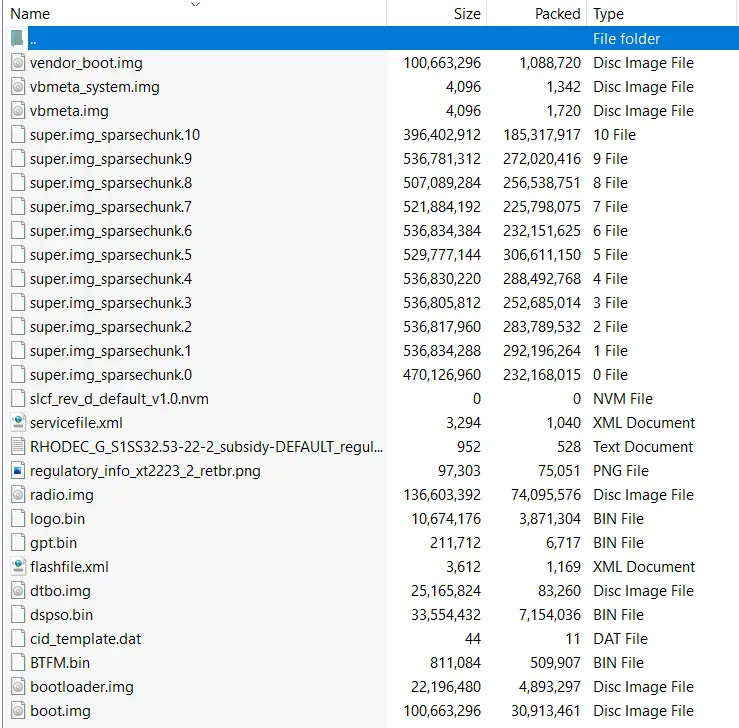
- Copy your downloaded firmware to the PC and Extract all the files from the .zip. Then, copy those files to the folder where you installed ADB and Fastboot.
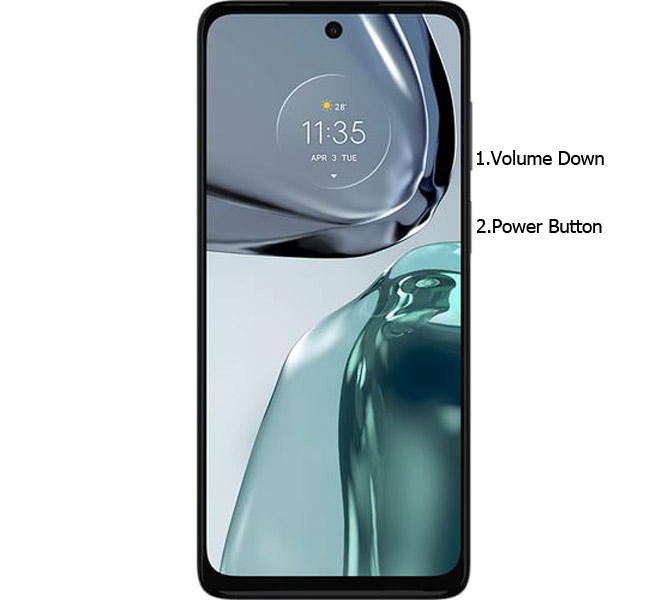
- Switch off your device. Then, enter into Fastboot mode. To do this, press and hold down the Volume Down + Power buttons simultaneously for some time.
-
Press the Volume Up button to continue when you see the warning message.
-
Connect the Motorola Moto G62 5G Mobile to the computer via USB cable.
-
Launch the fastboot on your computer. Next, open a Command prompt on your PC and type the below command.
- fastboot devices
- If you didn’t get the mobile phone, restart the command prompt and Disconnect and Connect your Motorola Moto G62 5G. It should display the connected devices. If you are detected, type the below commands.
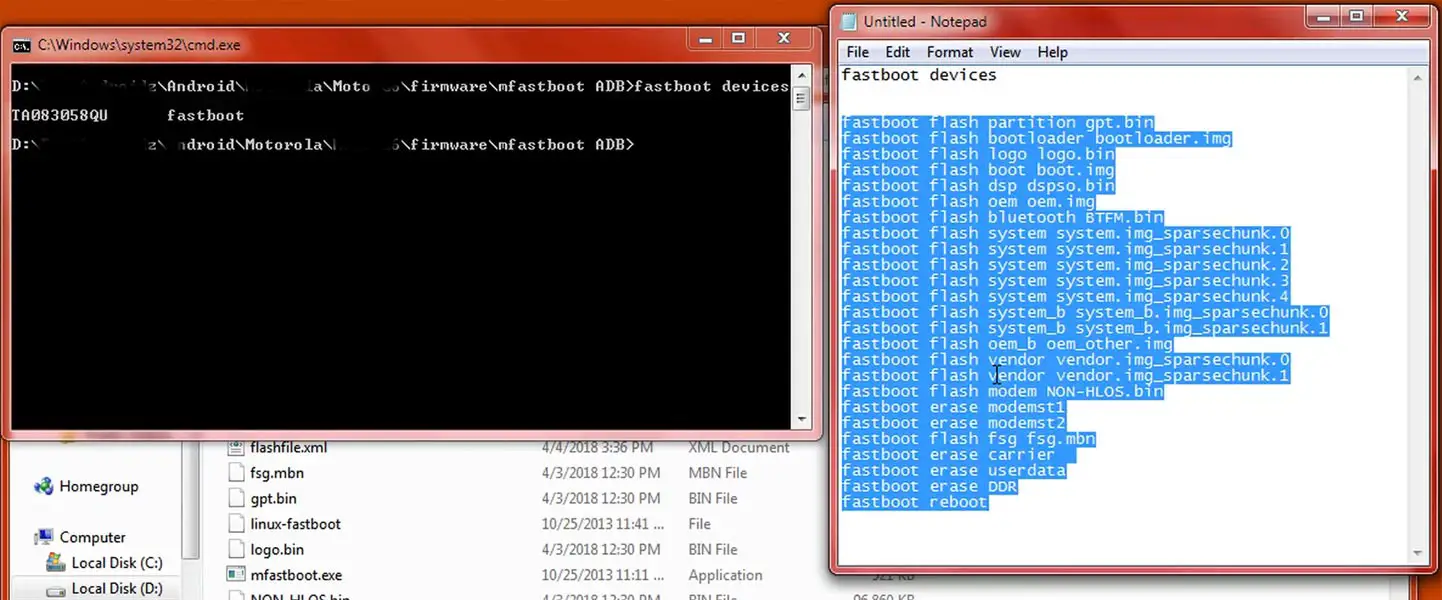
- I added all the text document commands to paste in your Command Prompt easily for your comfortable use. Download Moto firmware flash commands.txt.
- You don’t have to type every command. Instead, copy all the controls and paste them into the command prompt. It will execute the commands one by one.
- Wait for the process to complete. After the process is complete, It will boot into your flashed OS.
Motorola Moto G62 5G Android 12- RSD Lite Method
You can use this method to flash stock firmware if you use Custom ROM or a rooted device. Of course, it would be best if you had a PC for this process. Your bootloader is unlocked if you are rooted or have Custom OS. But if you relocked your bootloader, you should unlock the bootloader. After unlocking, Follow the below steps one by one carefully.
Unlock the bootloader using ADB and Fastboot

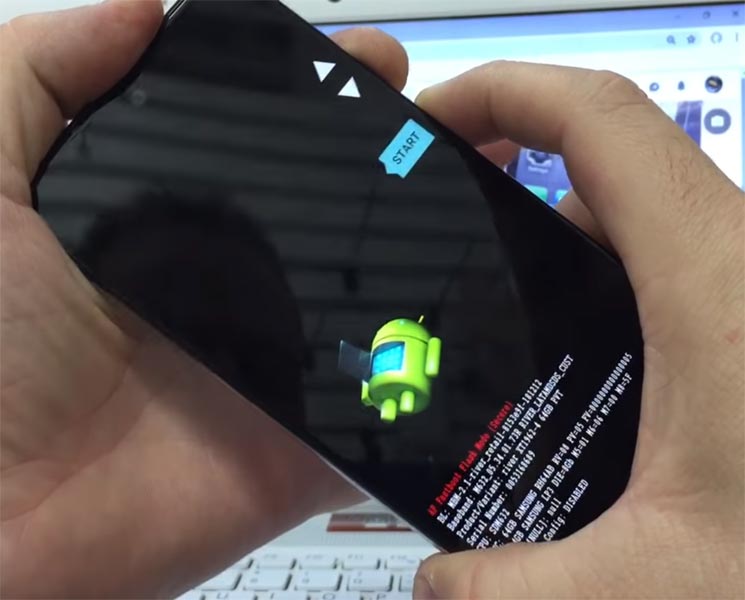
- Switch off your device. Then, enter into Fastboot mode. To do this, press and hold down the Volume Down + Power buttons simultaneously for some time.
-
Press the Volume Up button to continue when you see the warning message.
-
Connect the Motorola Moto G62 5G Mobile to the computer via USB cable.
-
Launch the fastboot on your computer. Next, open a Command prompt on your PC and type the below command.
- fastboot devices
- If you didn’t get the device ID, restart the command prompt, disconnect, and Connect your Motorola Moto Moto G62 5G. It should display the connected devices. If your device appears, then type the below commands.
- fastboot oem get_unlock_data
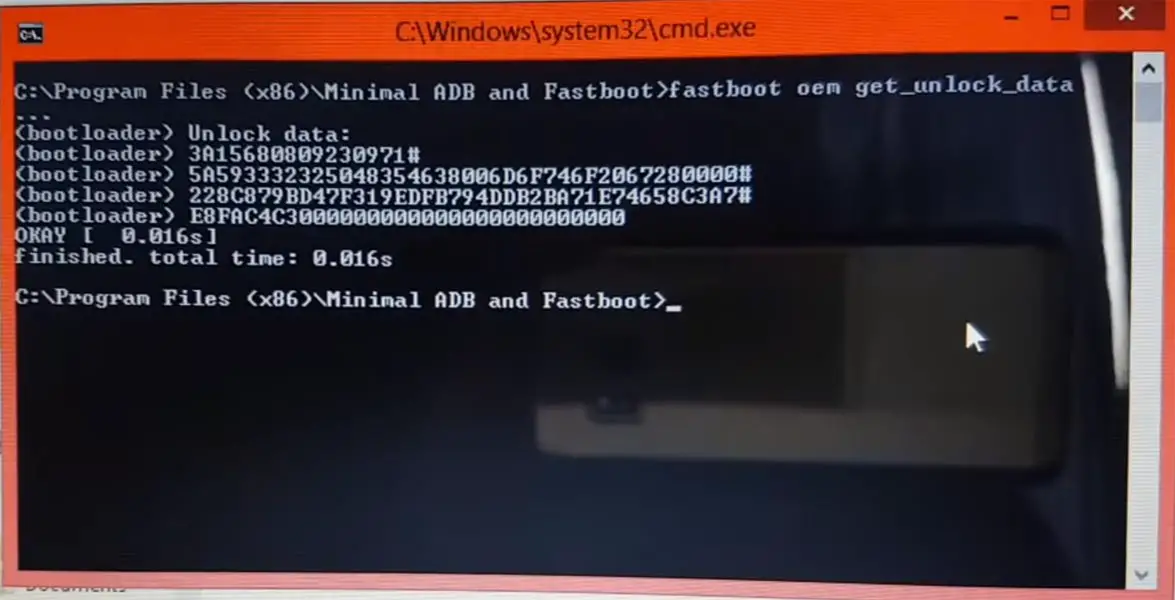
- Hit enter, and you will get some unlock data. Copy those codes, remove < bootloader> Prefix from those lines, and copy them into one line.
- Go to Official Moto Unlock Page. Log in with your Moto account, and in the Box; paste those codes and Check the unlock Bootloader Status. If you get, Yes, you can unlock; you can request unlock Key from Moto.
-
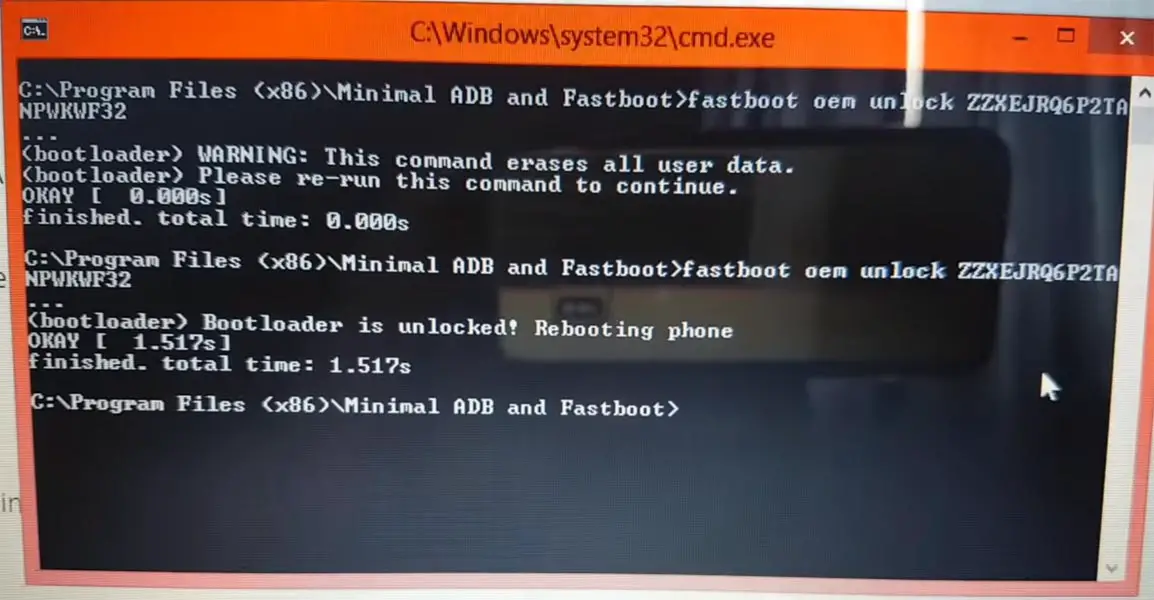
After the process, you will get 20 Digit to unlock the key in your email. Now type the following command to unlock the bootloader on your device.
- fastboot oem unlock UNIQUE CODE
-
You should type this code twice and Hit enter to unlock your device successfully. After successful unlocking, your device will automatically reboot to the standard OS.
- Check again to enable “Developer Options,” then go to the “Developer Options” and enable USB Debugging Mode, OEM Unlock and Enable the “Advanced Reboot.” Sometimes they disabled themselves after the boot.
Flash Motorola Moto G62 5G Android 12 Firmware using RSD Lite
-
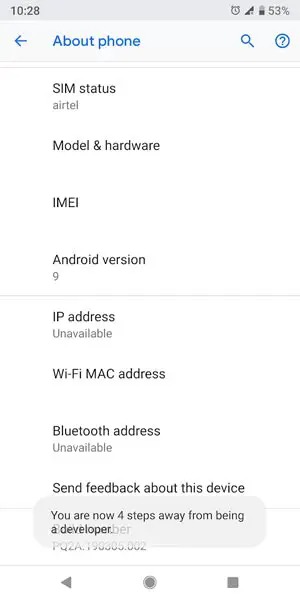
Enable USB Debugging Mode and OEM Unlock; you’ll find these options at Settings >>> Developer options. If you didn’t see the developer options on your settings menu, then go to about >>> build number; click on the “Build Number” row about ten times continuously to activate “Developer Option” on your device.
- Download the Motorola USB driver and install it on your PC.
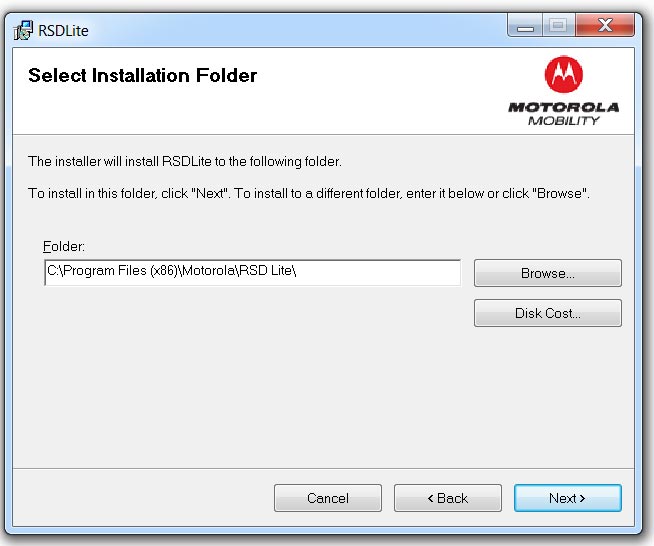
- We are using third-party software flashing. Download RSD Lite and install this also on your PC.
- Connect Your Mobile With the PC Using USB Cable.
- Switch off Your Mobile and Enter into Fastboot Mode->Press and Hold Volume Down+ Power Button.
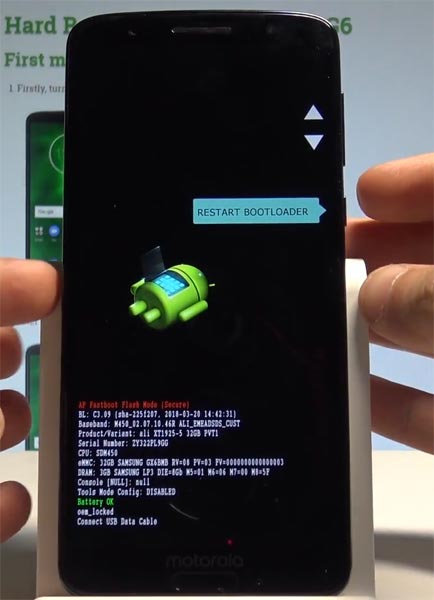
- Release all the keys when you enter into Fastboot mode.
- Now Launch RSD Lite. Select Your Downloaded Firmware Using this “…” The symbol in the RSD Lite.
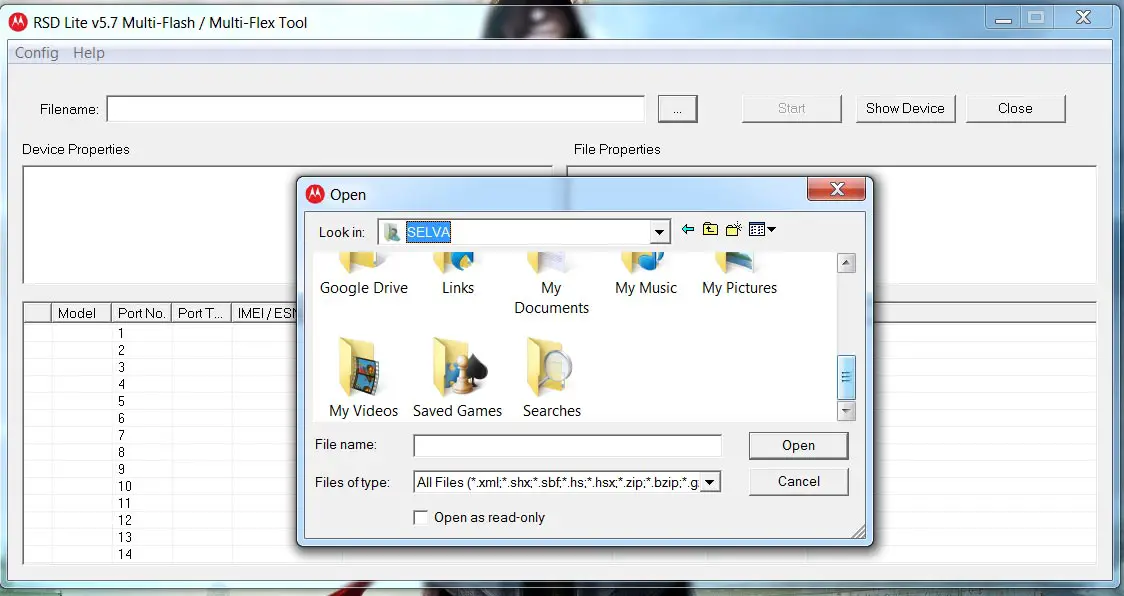
- It Will Asks For the Unzip. Just Select Uncompress.
- Check With Your Mobile Details.
- Now go to Your Mobile, Press Volume Down Key, And Select AP Fastboot. Make Sure that the USB Connected Message is Displayed (Transfer Mode: USB Connected).
- Now Select the Start in the RSD Lite. Wait For The Process to Complete; your Mobile Will Reboot After the Process Completion.
- You can Check the Firmware Details->Settings->About->Version.
Motorola Moto G62 5G Android 12 My UX Features
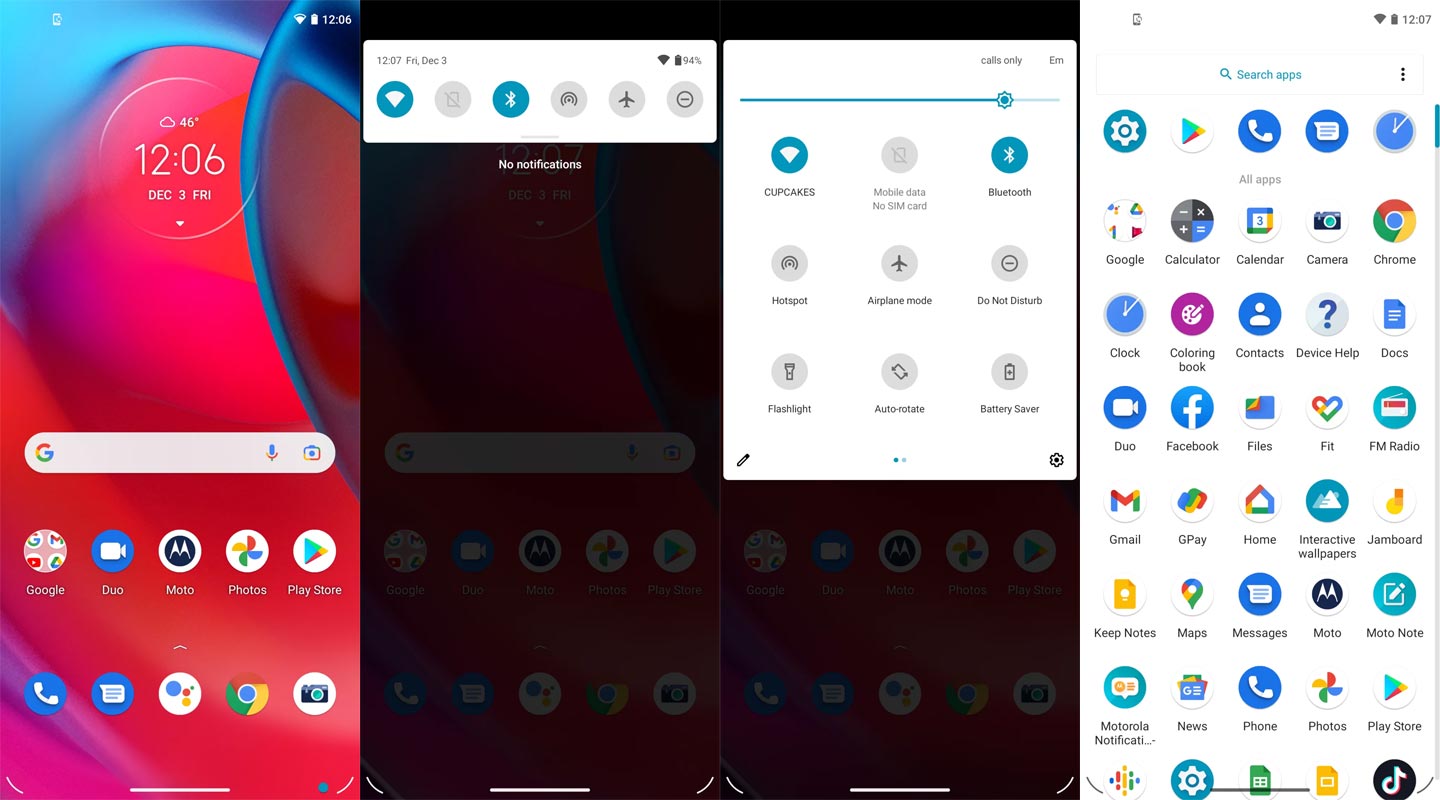
Many features are added in the 12 version compared with the Pie version. Here I mentioned some important features. My UX is consistent with stock Android. Motorola may put its stamp on things, but those who have used Pixel devices or Sony smartphones or enjoy stock Android will find much to love.
In general, My UX is very user-friendly. It is bright, inviting, and easy to use. Its simplicity keeps it simple and easy to use. It has a lovely sheen that makes it attractive to the broadest audience. This makes sense, considering Motorola makes mostly mid-range devices that can be used by adults and children alike.
New Gestures
Let’s suppose you need to activate your phone’s flashlight function. Most people will need to unlock their phones to turn on the flashlight. Motorola users can make a simple chopping motion with one hand to turn on the flashlight. It’ll turn on after two more chops.
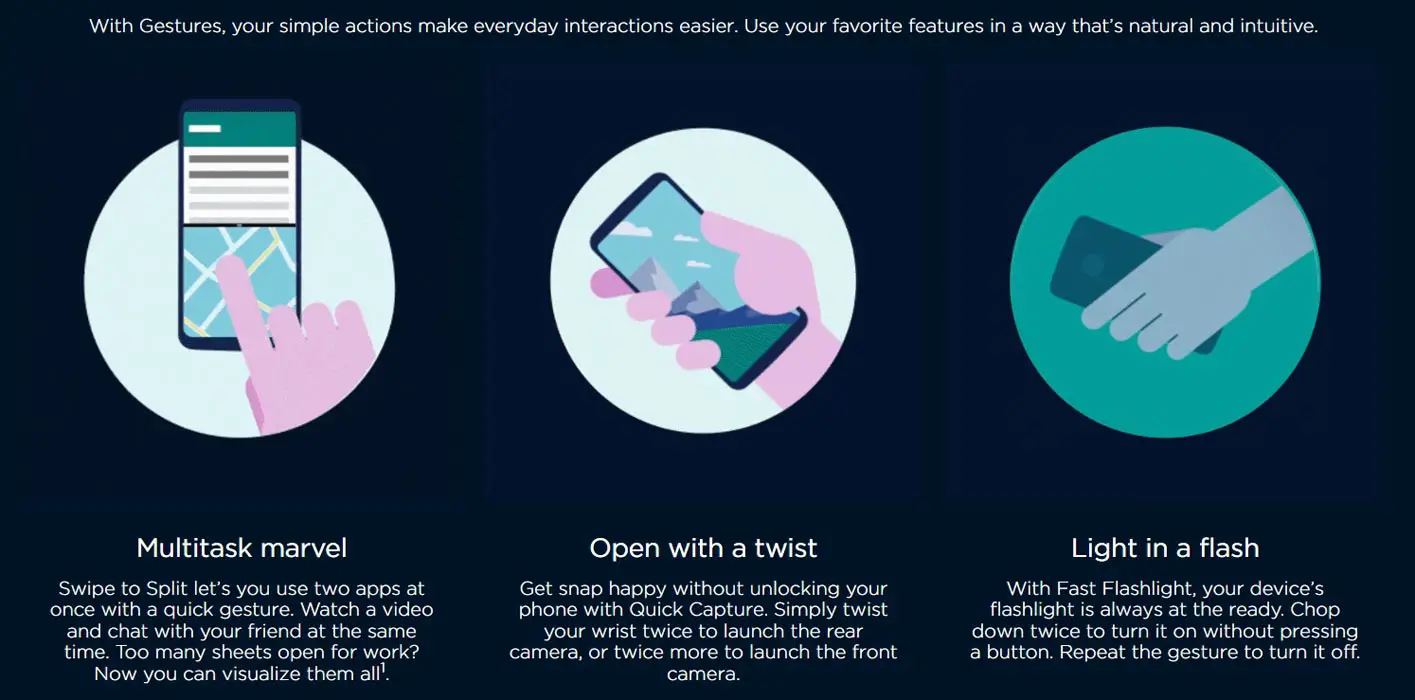
My UX has many gesture shortcuts such as these. These include the quick opening of the camera, taking a screenshot, putting the phone in Do Not Disturb mode, etc.
Attentive Display
The screen might dim after reading on your phone for a long time. You can either extend the screen’s life (which will drain the battery) or tap the screen repeatedly (which can be annoying).
The Attentive Screen solves this problem by keeping your screen on even though you are looking at it. It requires you to scan your face. Some people might not like this, but it works well once it’s all set up.
Display styles
People love the freedom to customize their phones to suit their needs. This usually involves downloading a third-party launcher or another app. You can make fundamental changes to the home screen with My UX. You can change the font, accent colors, and icons’ shapes.
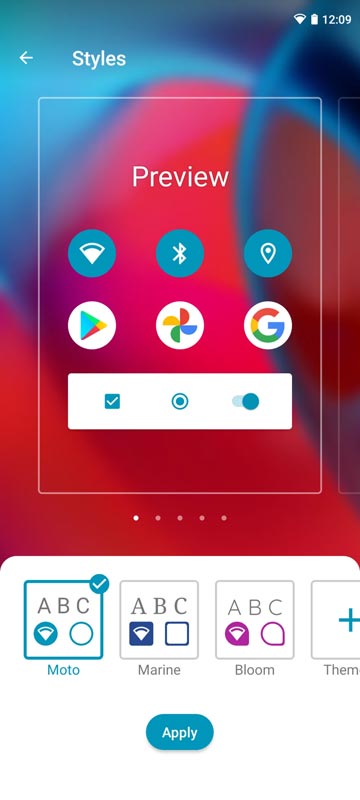
Although it isn’t as robust as Samsung Color OS or Oppo Color OS’s OneUI, it’s still better than nothing.
Separate Moto App
It can be hard to find the unique features of some Android skins. Sometimes they are hidden in Android Settings, so it can be difficult to tell if these features are part of Android. Motorola’s My UX allows you to have a Moto app that combines all of the best features in one place.
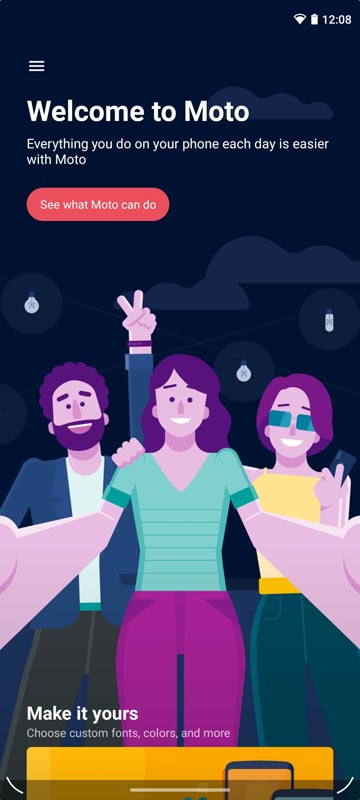
This app is a quick way to access all features and removes the need to search for them. This app is handy, and we wish more companies would do this.
Conversational Widgets
Motorola’s new My UX Android 12 update will include Conversational Widgets, which allow you to see messages from family and friends in a widget on your home screen. This widget will let you quickly glance at important notes without opening the app.
Privacy
The standard camera and microphone indicators handle Privacy. You can also access the privacy dashboard to view apps that have access to your camera, microphone, and other information.
Google always added enhanced Privacy features in every Android version. In the 12th version, You can handle your Privacy a lot better. It will always tell you when your installed apps access your location in the background to manage whether you need that Permission on Always or During the app usage.
Live Caption
You know this already; if you turn on Subtitles on Youtube, It will auto-generate the captions. It can work on the Same functionality all over your device videos. It Doesn’t require Wi-Fi/ Data. This feature is not yet available. But, It will be rolling out soon.
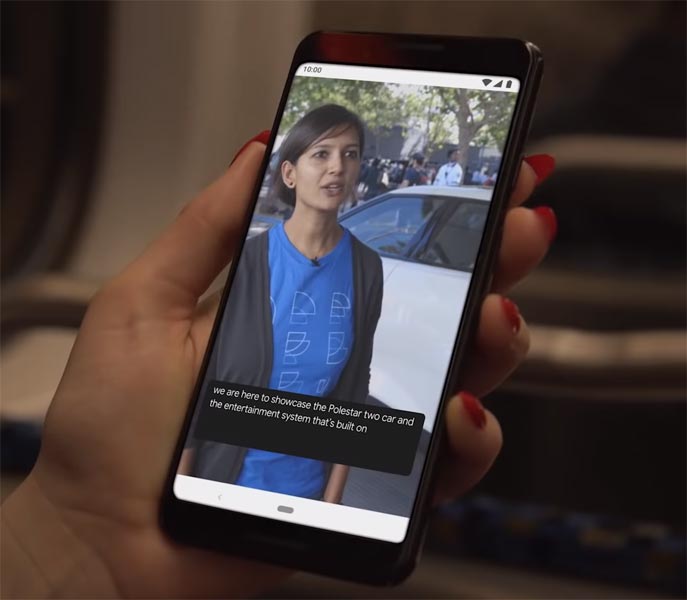
- The language limit depends on Google Data.
Smart Reply
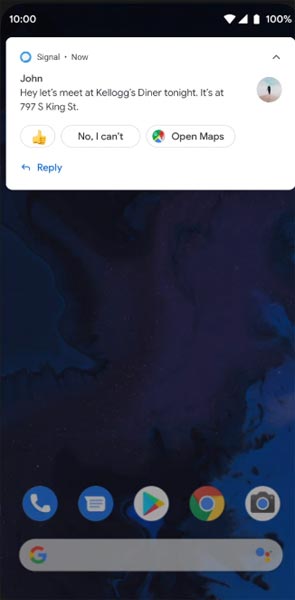
It is already available in the Pie version. But it is limited. Now you can explore more actions when you get the messages. For example, you can Open Links, Open Apps based on the Messages.
Sound Amplifier
We can now adjust the Volume, Tune, and Equalize using the built-in feature. You can do many things like Reduce noise and Enhance the Tune. We always do this using Third-party apps.
Enhanced Gesture Navigation
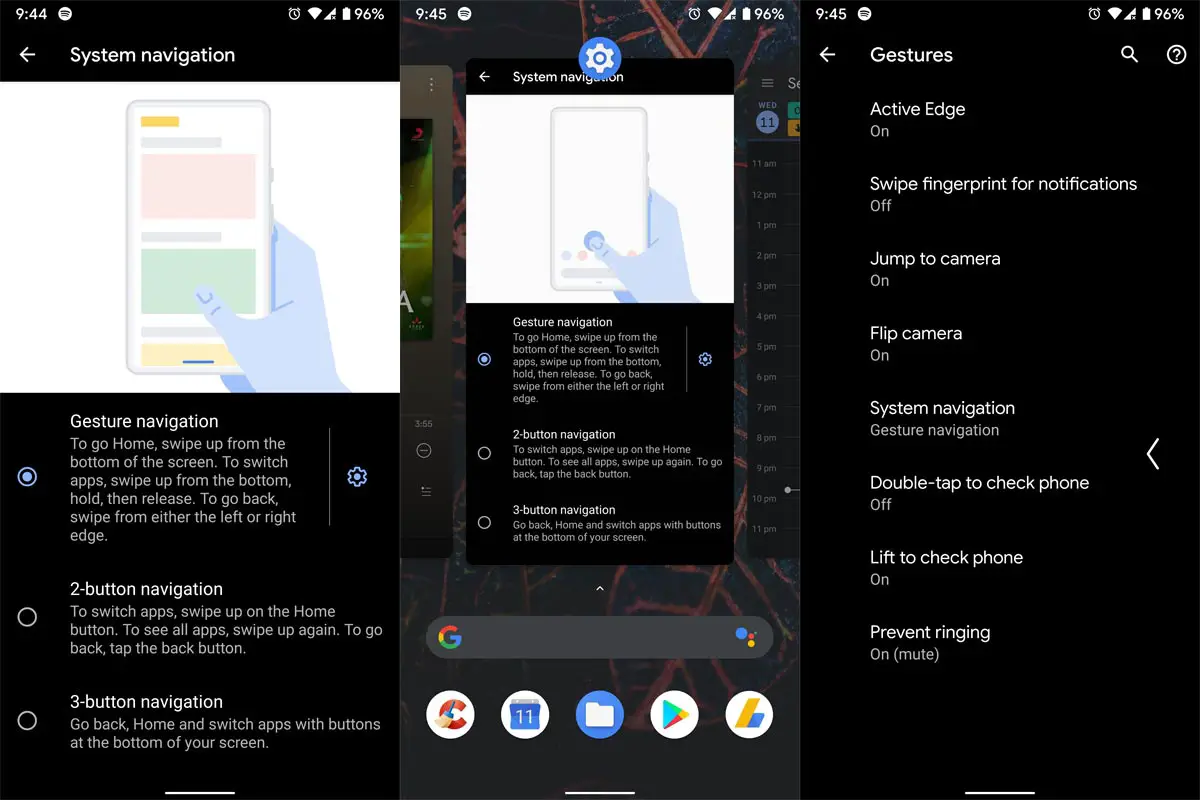
The True Gesture Navigation has finally arrived. It may not be the best compared with OnePlus devices, But It is way better than the Pie 9.0 version. If you swipe From Left to Right, It goes forward. Right to Left goes Backward. Home button work as usual. You can access recently used apps By Swiping Quarter Screen to the Top. Simple Navigation to avoid confusion.
Dark Mode
It is not like Night Mode. It didn’t add a filter on display. If you have OLED Display, It will save your battery power from 5-30% based on your usage.
Direct System Updates
Unlike regular OTA updates from your Manufacturers, the frequent patch updates will be handled by Google After you update to the Android 12 version. The update will utilize the Google Play App. If you have Custom Skin OS from your Manufacturer, Google will not change the UI. They will handle only Patch updates. The direct Security patch update is one of the most critical steps taken from their side. It will help all the users who are tired of their Manufacturer’s Late updates.
Focus Mode
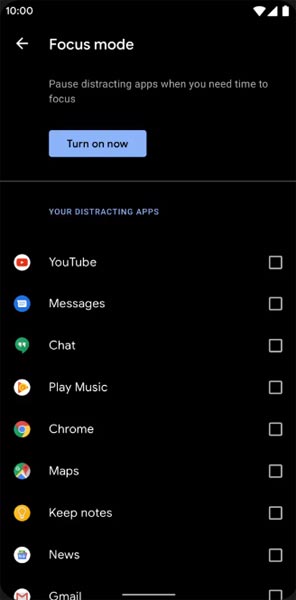
It can be an additional function of Digital well-being. Now you can Pause some apps to avoid the Notifications For a short time or a Long time. Some mobiles are made based on this scenario. To avoid distractions and get focused on what you are doing. For example, think you are Studying, and a Single Whatsapp message can redirect you. With the help of this feature, you can use only Study apps during your Study time.
Family Link
-
It is like Parental Control. You can control the App Timings within your Added Google Accounts.
Manage Message Conversations
- Better Conversation management with Chat Bubble. You can manage all Messaging services in one place. You can also get the One Chat Bubble Notification on the Lock Screen.
Control Connected devices in one place
- With the help of a group of connected devices, You can control andy connected Smart Device by launching Power Menu Options.
New One-Time Privacy Permissions
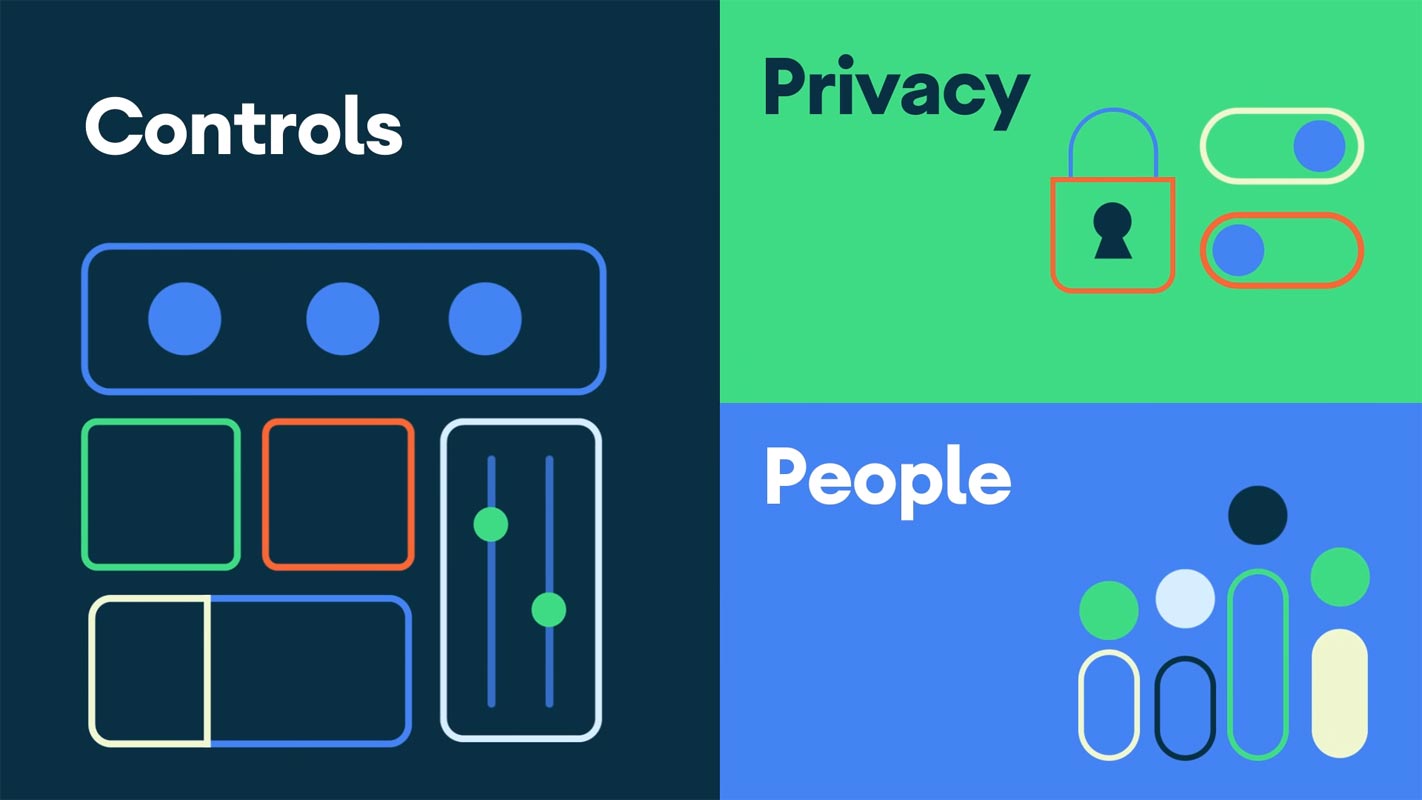
- You can give time Permission to the app to access your Location, Calls, or Messages.
Other improvements and changes
- HEIF Image, Monochrome Camera Support.
- New Set of Emoji.
- Enhanced Adaptive Battery Improvements compared with the Pie version.
- Contaminant Detection- Your mobile will alert you if any moistures are in your USB Ports.
- Attentive Display- If you look at your mobile, It will always wake.
- You can use three-finger gestures to take a screenshot.
- Dolby Audio hereafter Moto Audio.
Final Words
If you are in Stock firmware, Use the ADB-based method. It is comfortable and safe; You can update it like a Regular OTA Update. But if you were already using Rooted devices, You can try TWRP based method. Don’t download any third-party apps; sometimes, it may trigger the updates process. There are a lot of new Gestures available in this update; try them also. In my opinion, Motorola Moto G62 5G Android 12 near Stock Android is better compared with some other Custom Skin OS. So try to use this OS instead of a Custom OS. But the decision is your choice…:)

Selva Ganesh is the Chief Editor of this Blog. He is a Computer Science Engineer, An experienced Android Developer, Professional Blogger with 8+ years in the field. He completed courses about Google News Initiative. He runs Android Infotech which offers Problem Solving Articles around the globe.


Leave a Reply